NJ Garage Floor Coating Contractor
The Last Garage Floor
You Will Ever Install
Professional polyaspartic flake floor systems — diamond-ground, crack-repaired, and built to last 15+ years. We are not a franchise. We are a local NJ crew that has been doing this since 2009.
Coating Systems
Two Systems. One Standard of Excellence.
Both systems are installed with the same diamond-ground prep and full-broadcast flake. The difference is in the chemistry and the level of protection.

Signature Polyaspartic System
The professional standard for residential garages in NJ
Typical Starting Price
$2,250 — Single-Car Garage
Two-car garage from $3,600 · Free on-site quote
Diamond Grinding
Full surface prep to proper CSP — no acid etching
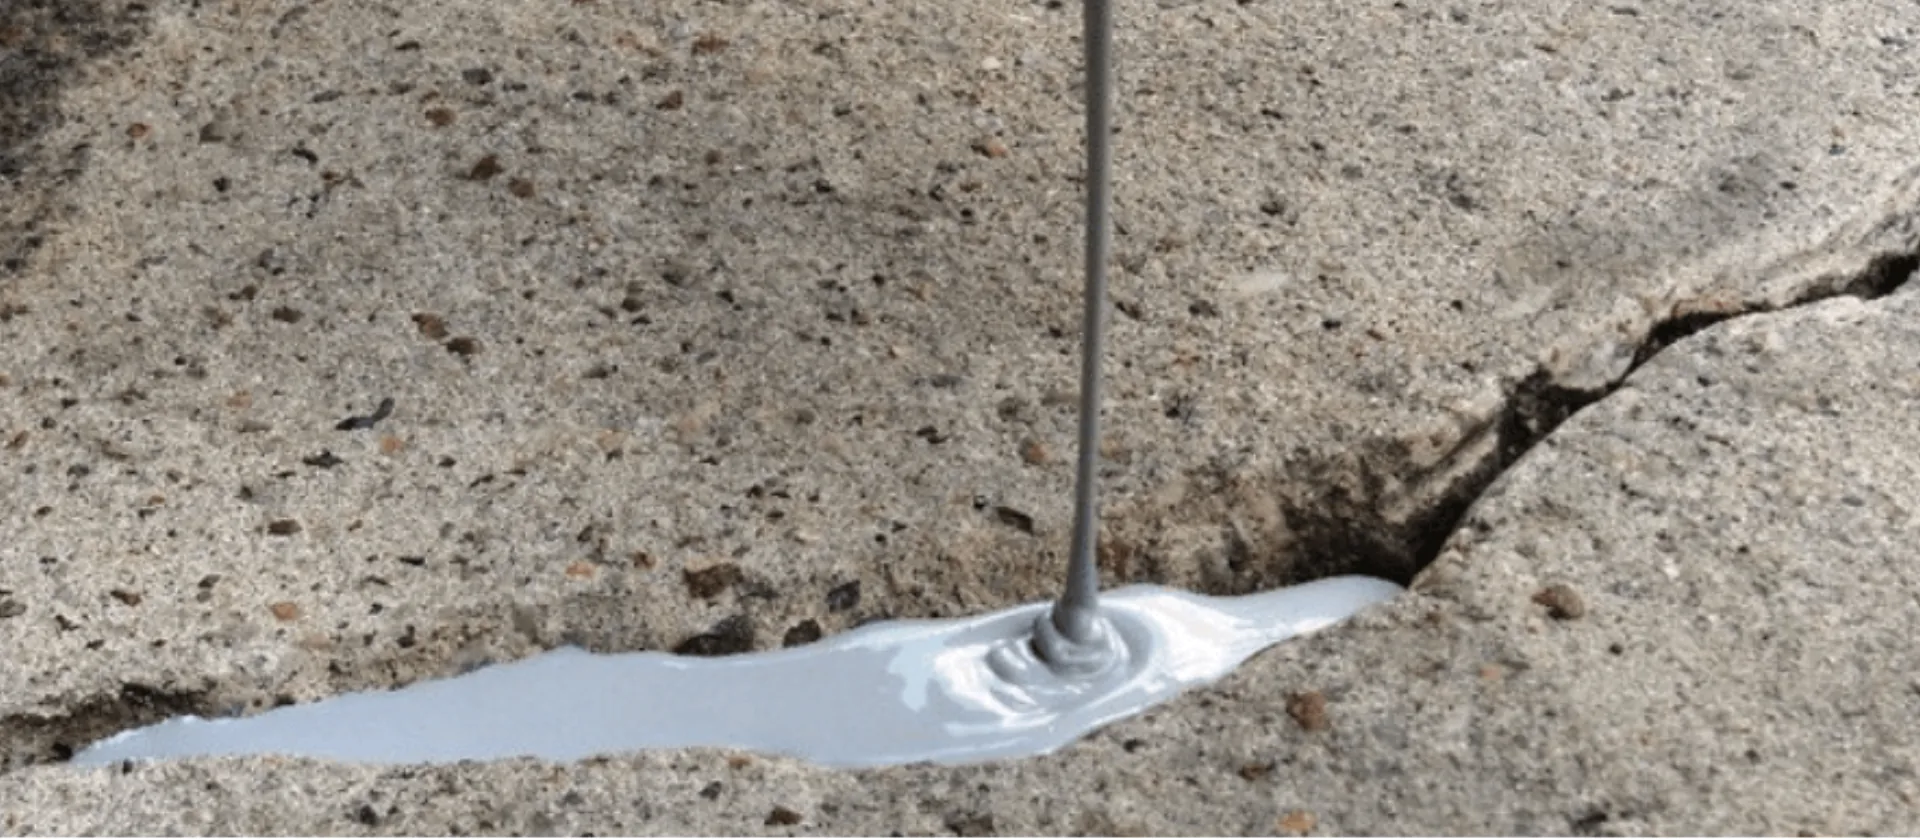
Crack & Spall Repair
All cracks and chips filled before coating begins
Polyaspartic Base Coat
Commercial-grade, fast-cure, UV-stable base
Full-Broadcast Decorative Flake
100% coverage — your choice of 10+ color blends
Polyaspartic Clear Topcoat
UV-stable, chemical-resistant, high-gloss finish
Also Included
- ✓ Apron coating (pigmented breathable acrylic sealer)
- ✓ Stem wall coating up to 2 feet
- ✓ Full vacuum during grinding
- ✓ 10-year warranty
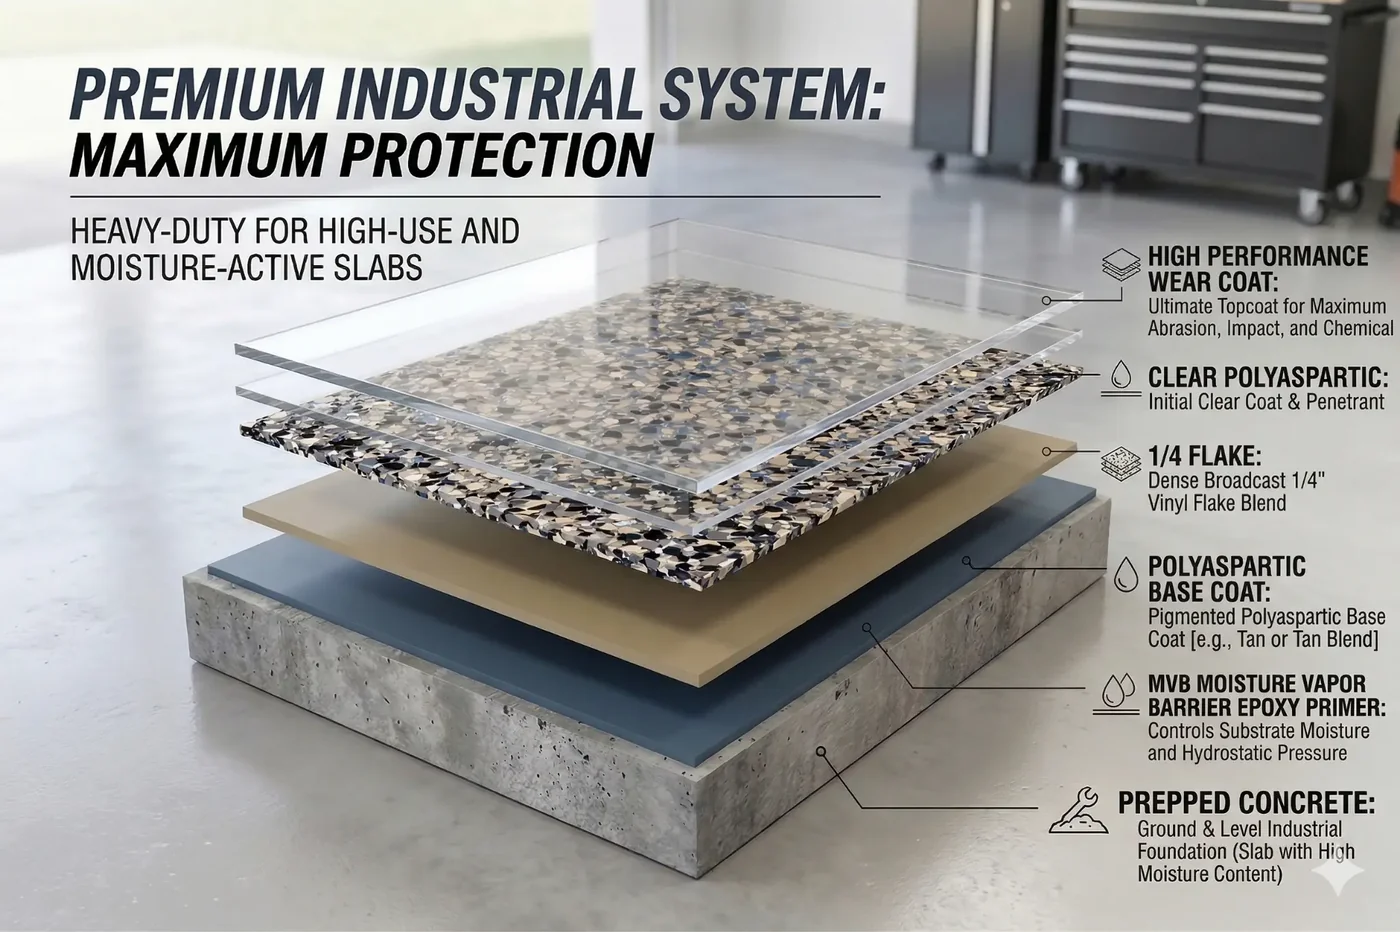
Premium Industrial System
Maximum protection for high-use and moisture-active slabs
Typical Starting Price
Contact Us for Pricing
Free on-site assessment required
Diamond Grinding
Full surface prep to proper CSP
Crack & Spall Repair
All defects filled before coating
Moisture Vapor Barrier Epoxy
Prevents delamination on moisture-active slabs
Polyaspartic Base Coat
Commercial-grade base over MVB layer
Full-Broadcast Decorative Flake
100% coverage, 10+ color blends
Polyaspartic Topcoat
UV-stable clear coat
Polyurethane + Aluminum Oxide
Ultimate wear layer — max abrasion resistance
Also Included
- ✓ Apron coating (pigmented breathable acrylic sealer)
- ✓ Stem wall coating up to 2 feet
- ✓ Full vacuum during grinding
- ✓ 15-year warranty
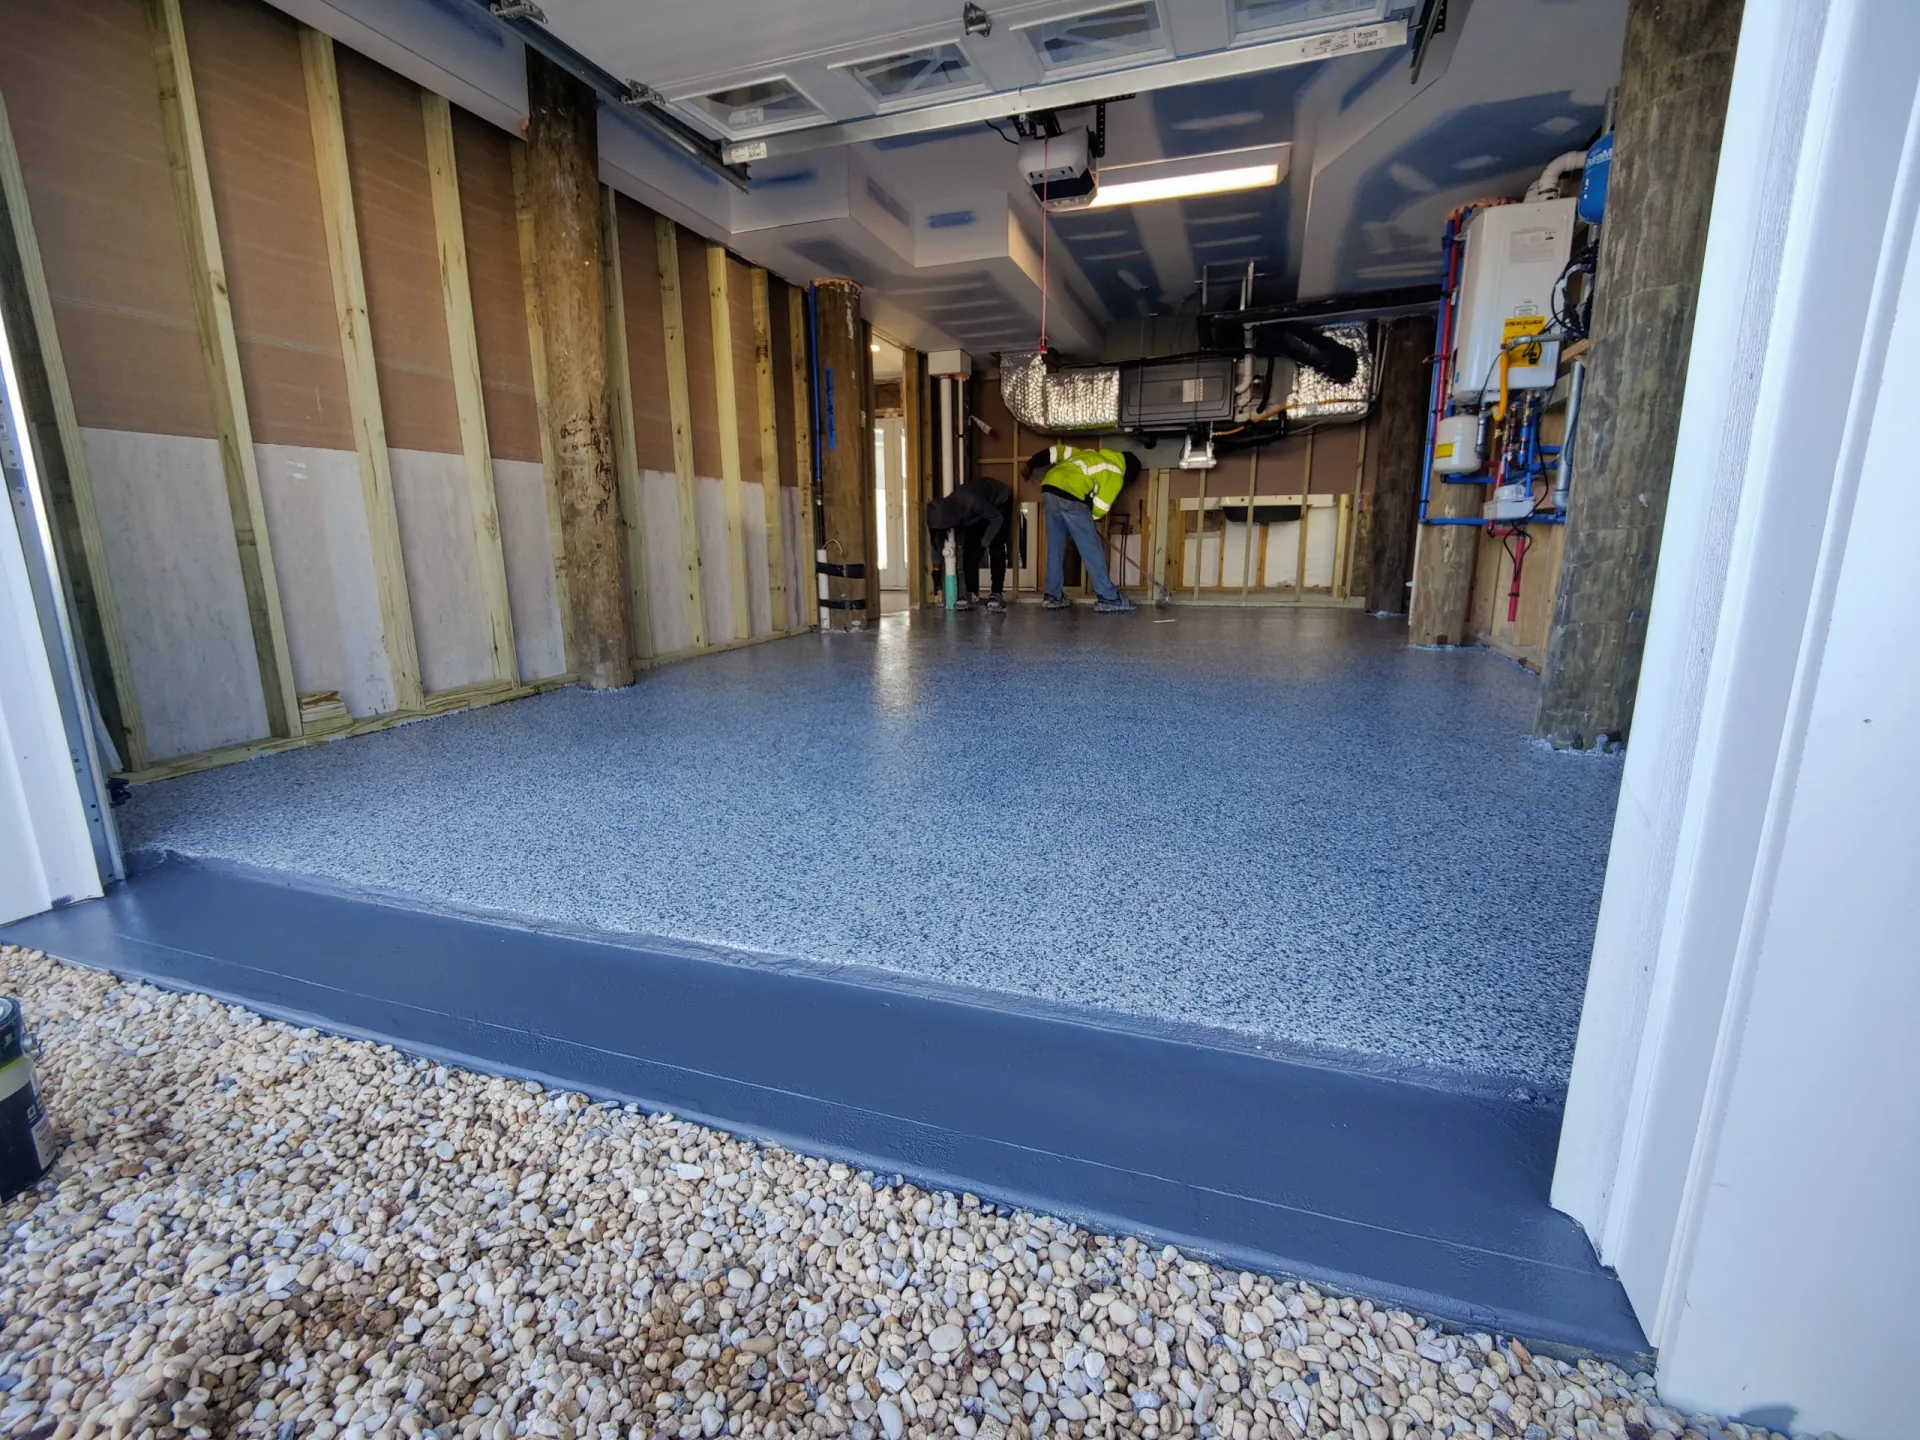
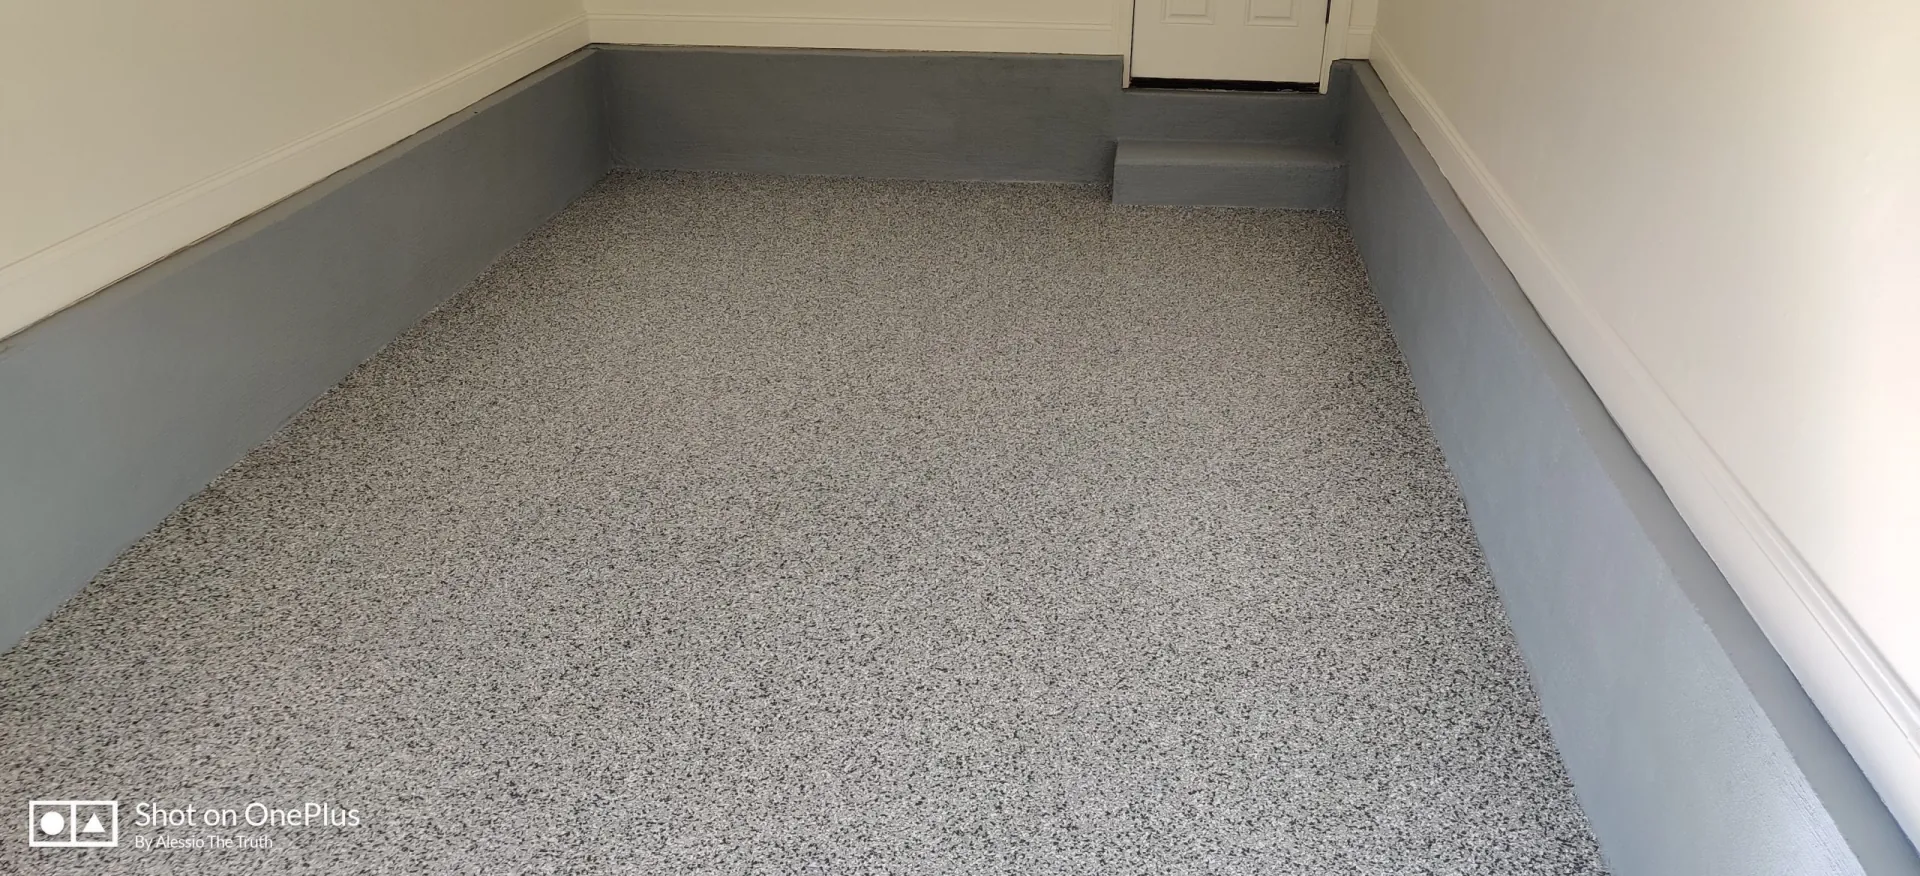
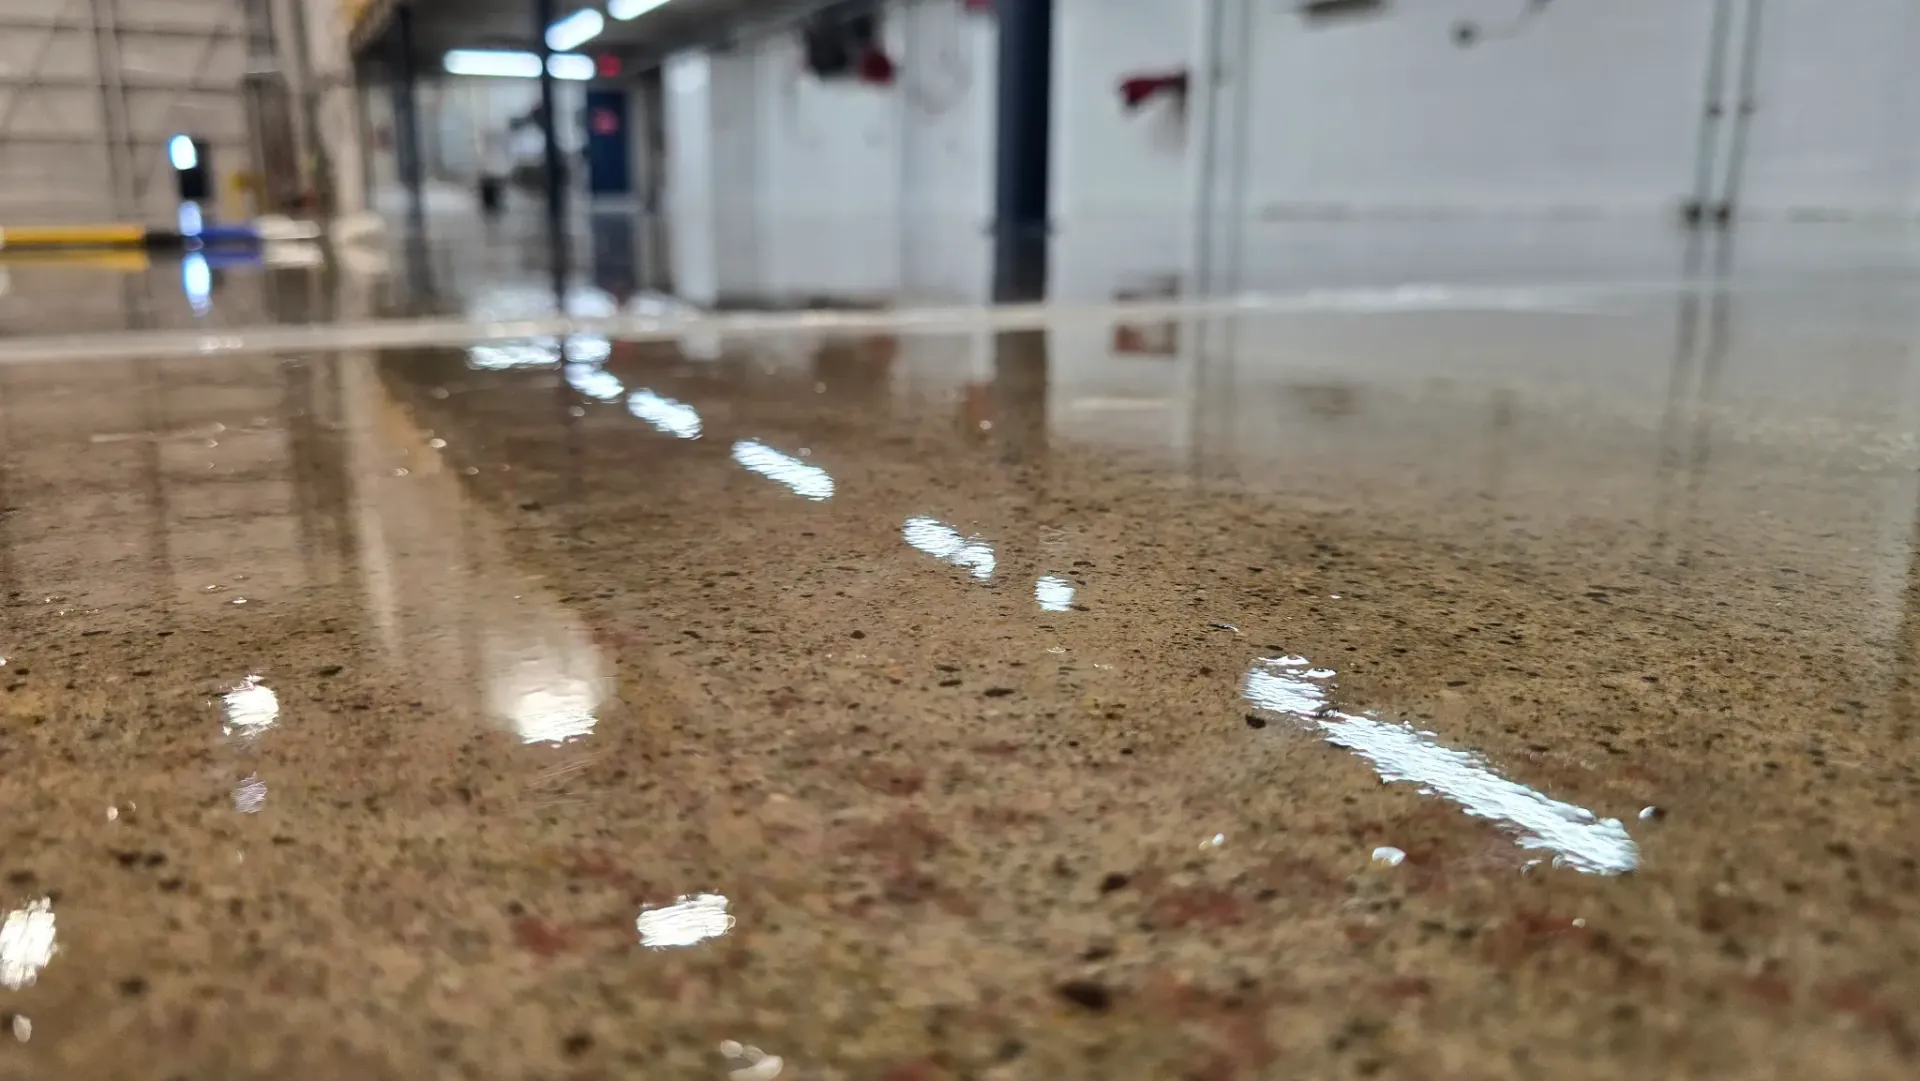
Finished Garage Floors
Every photo below is a real job completed by our crew in New Jersey. No stock images. No franchise work. These are the floors we have installed — diamond-ground, crack-repaired, and built to last.
What Goes Into Your Floor — Layer by Layer
Signature Polyaspartic System — 5 Layers
10-Year WarrantyPolyaspartic Clear Topcoat
UV-stable, chemical-resistant, high-gloss
Full-Broadcast Decorative Flake
100% coverage, 10+ color blends, traction texture
Polyaspartic Base Coat
Commercial-grade, fast-cure, bonds to CSP
Crack & Spall Repair
All defects filled with professional-grade mortar
Diamond-Ground Concrete
Proper CSP — mechanical bond profile
Premium Industrial System — 7 Layers
15-Year WarrantyPolyurethane + Aluminum Oxide
Ultimate wear layer — max abrasion resistance
Polyaspartic Topcoat
UV-stable clear coat — first protective layer
Full-Broadcast Decorative Flake
100% coverage, 10+ color blends
Polyaspartic Base Coat
Commercial-grade base over MVB layer
Moisture Vapor Barrier Epoxy
Prevents delamination on moisture-active slabs
Crack & Spall Repair
All defects filled before coating
Diamond-Ground Concrete
Proper CSP — mechanical bond profile
Apron Coating &
Stem Wall Finishing
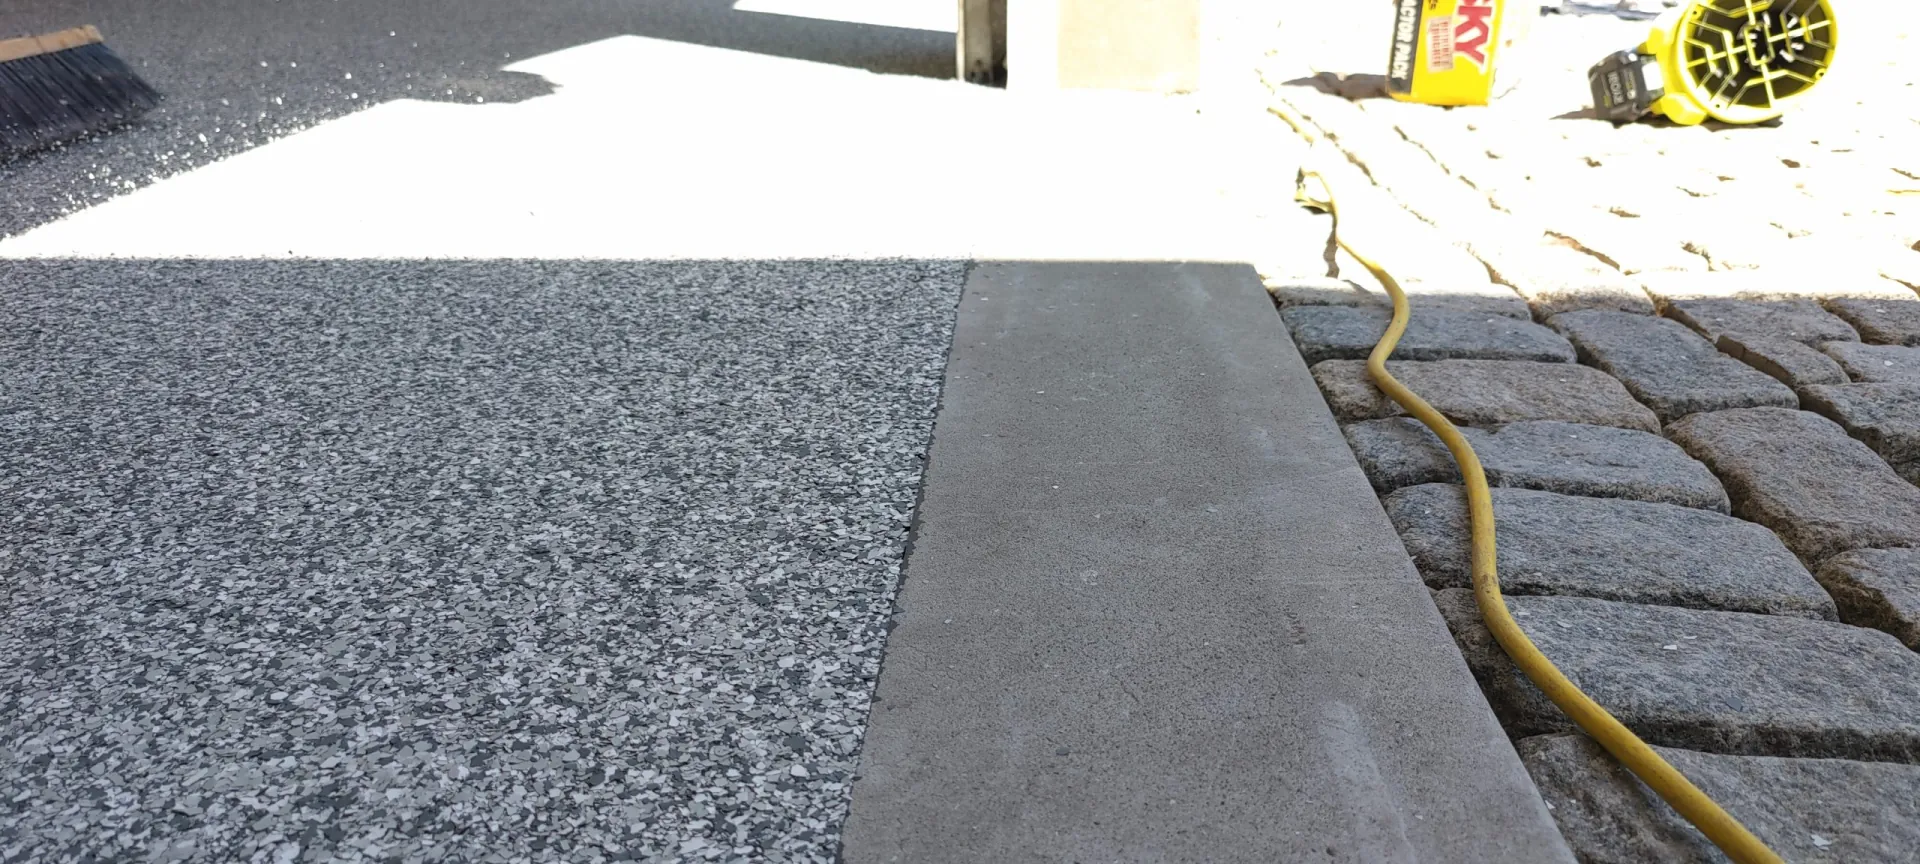
Most contractors stop at the garage door. We do not. Every system we install includes coating the concrete apron — the slab that extends outside the garage door — and the stem walls up to 2 feet high.
The apron is coated with a pigmented breathable acrylic sealer. We cut a clean line where the flake system ends inside the garage and the acrylic begins outside. This is critical: the polyaspartic flake system is designed for interior use, while the breathable acrylic sealer is formulated to handle freeze-thaw cycles, moisture vapor, and direct weather exposure.
The result is a fully finished, cohesive look from the inside of your garage to the edge of your driveway — and a floor system that is protected where it matters most.
| Zone | System |
|---|---|
| Interior Garage | Polyaspartic Flake System |
| Apron (outside door) | Pigmented Breathable Acrylic Sealer |
| Stem Walls | Same acrylic sealer, up to 2 ft high |


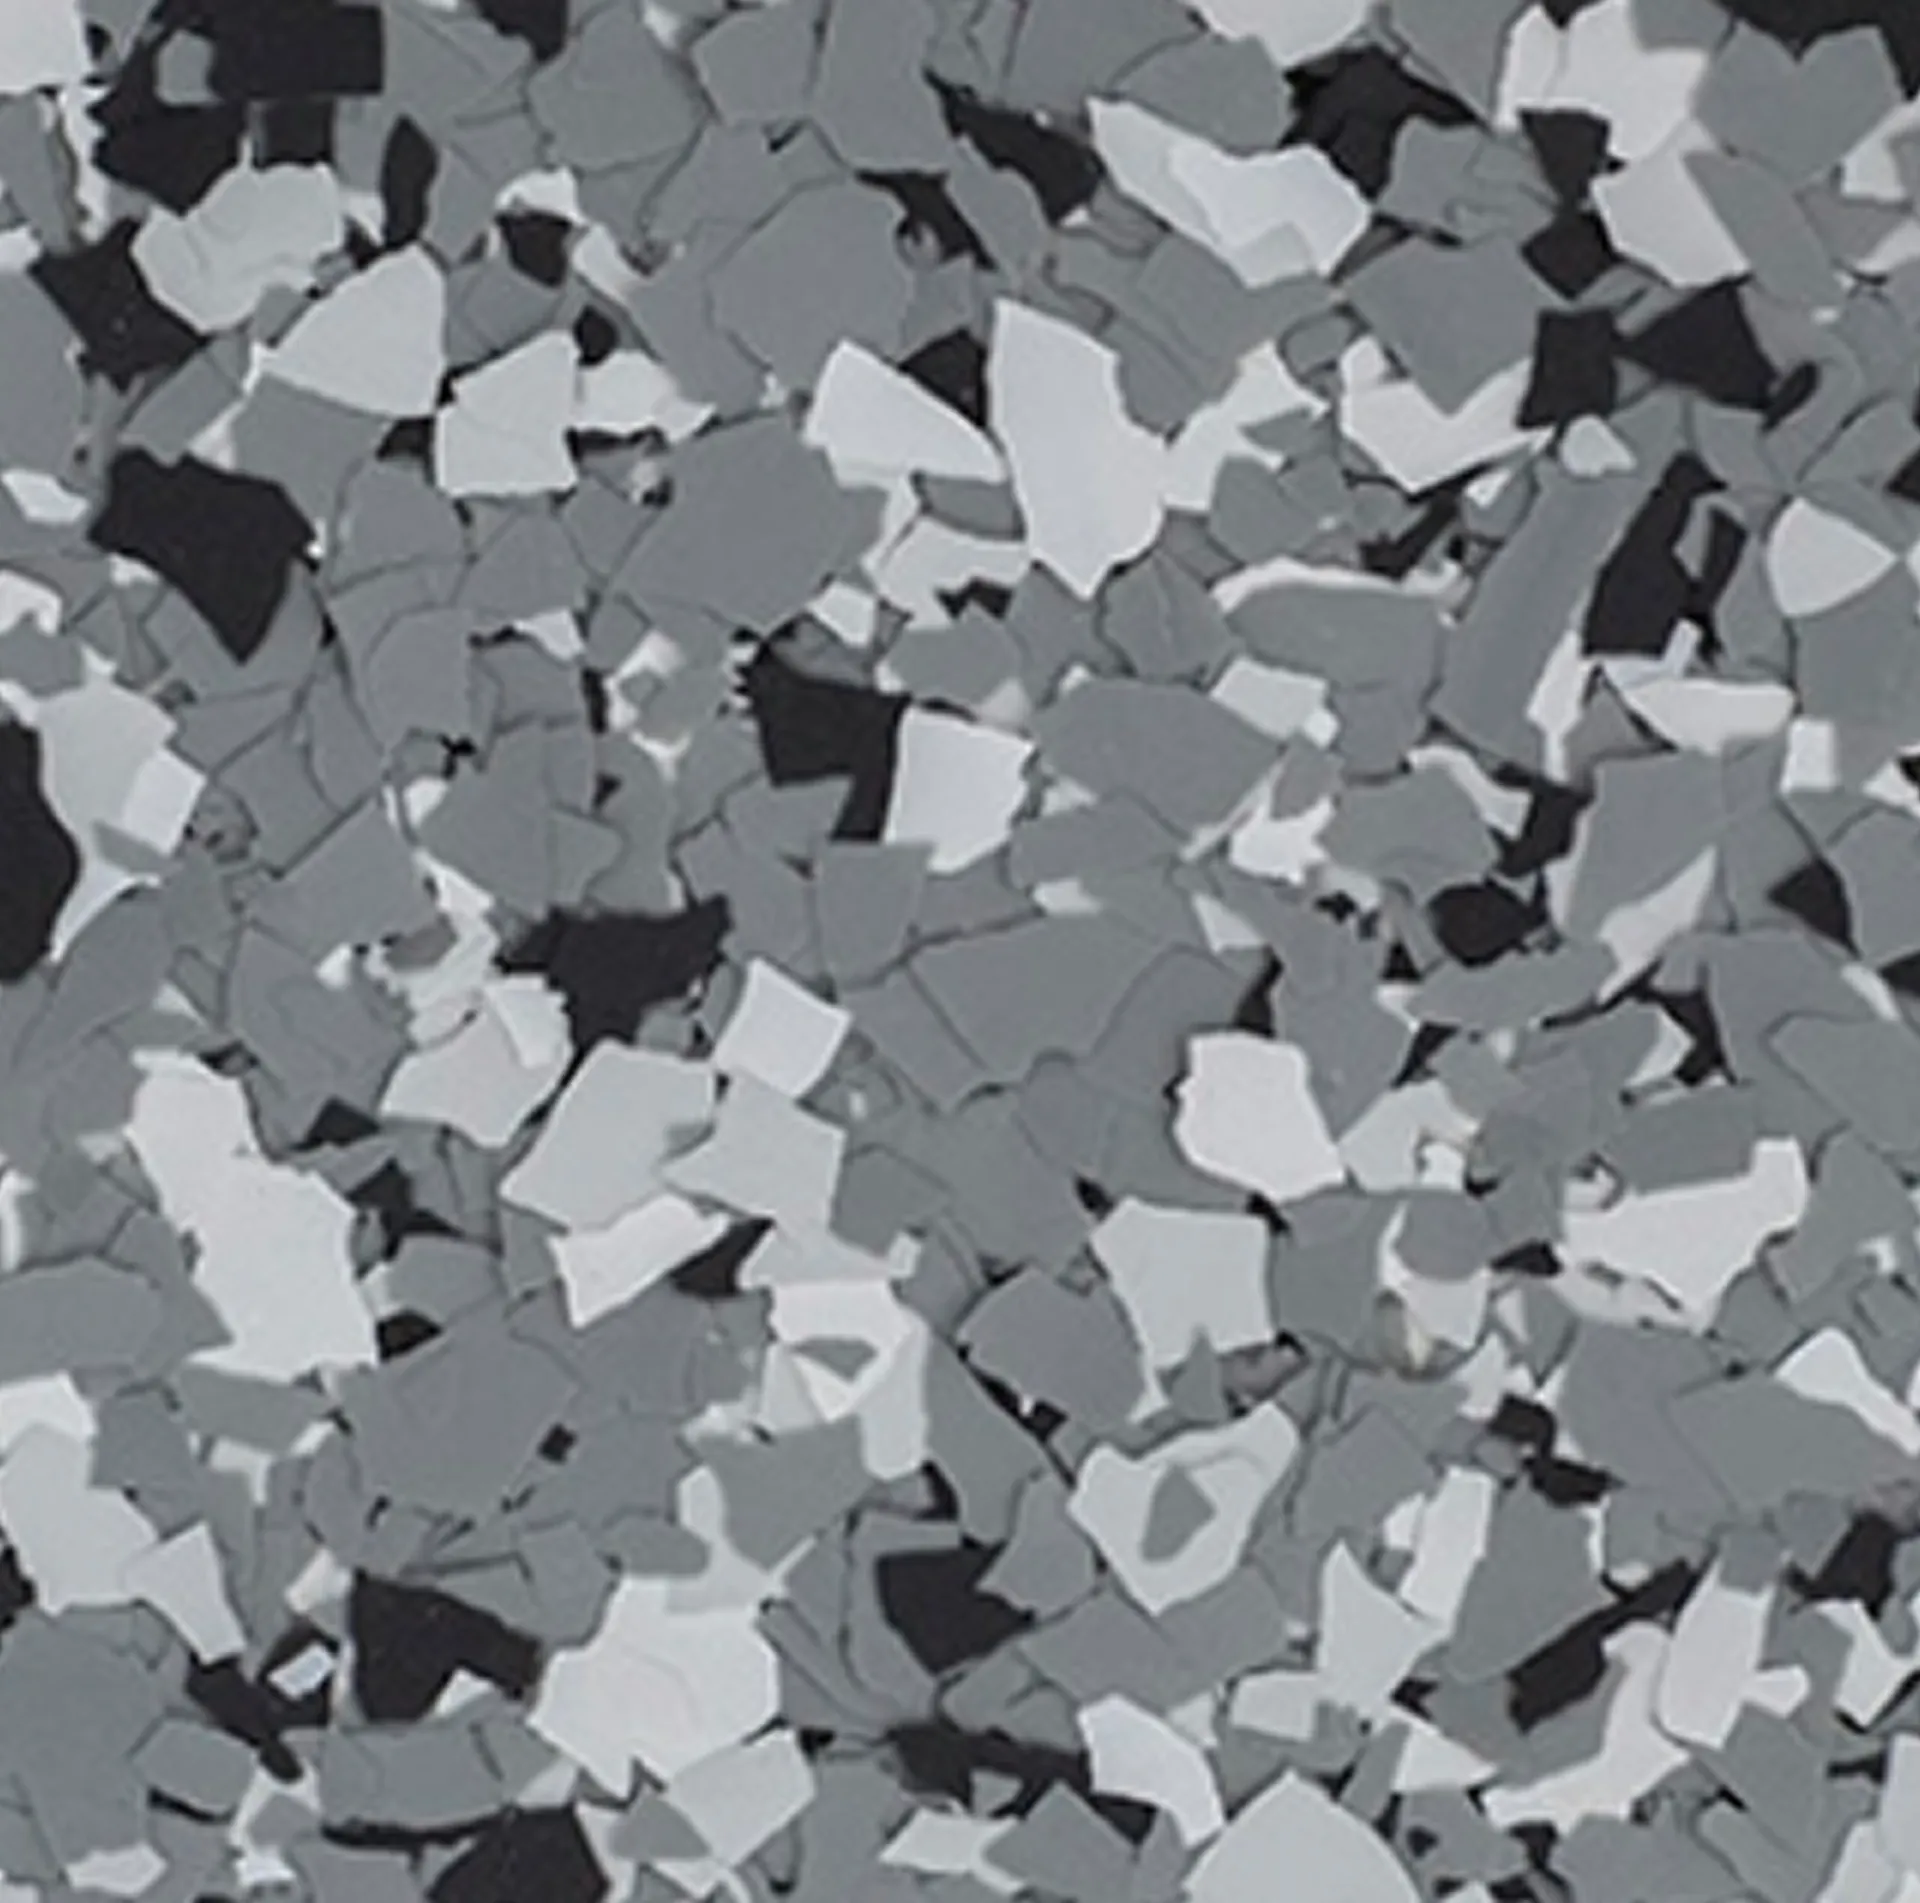
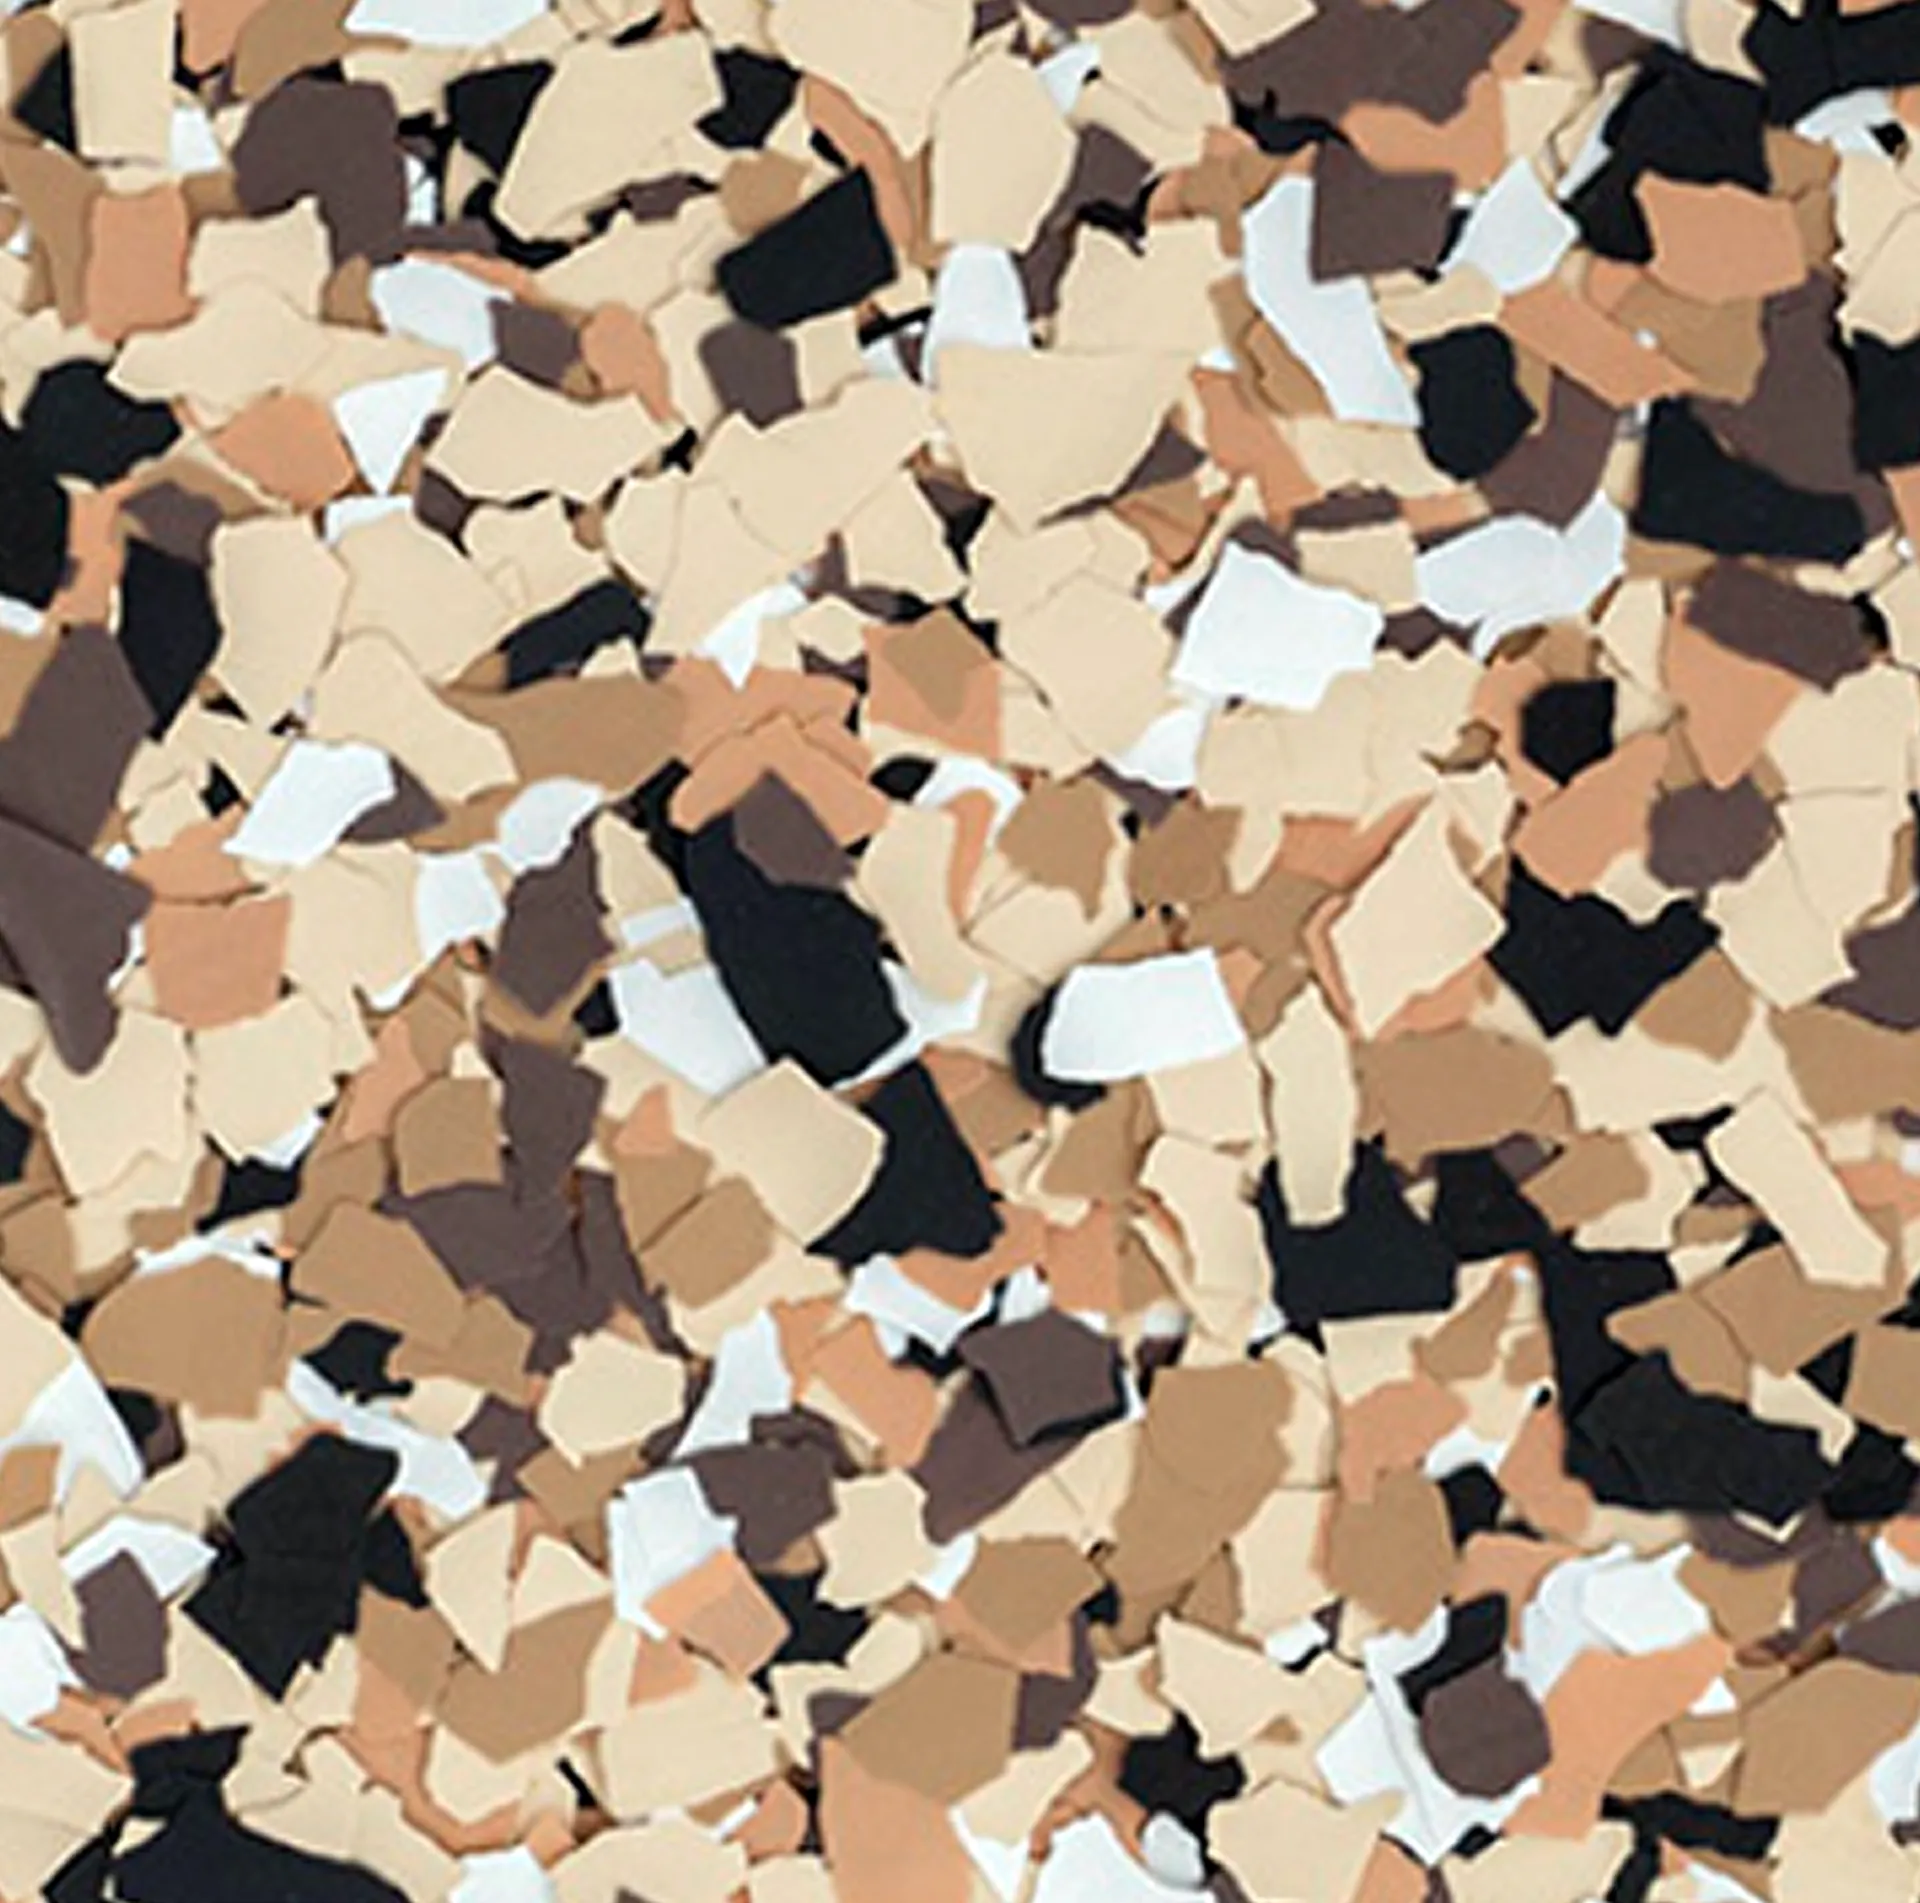
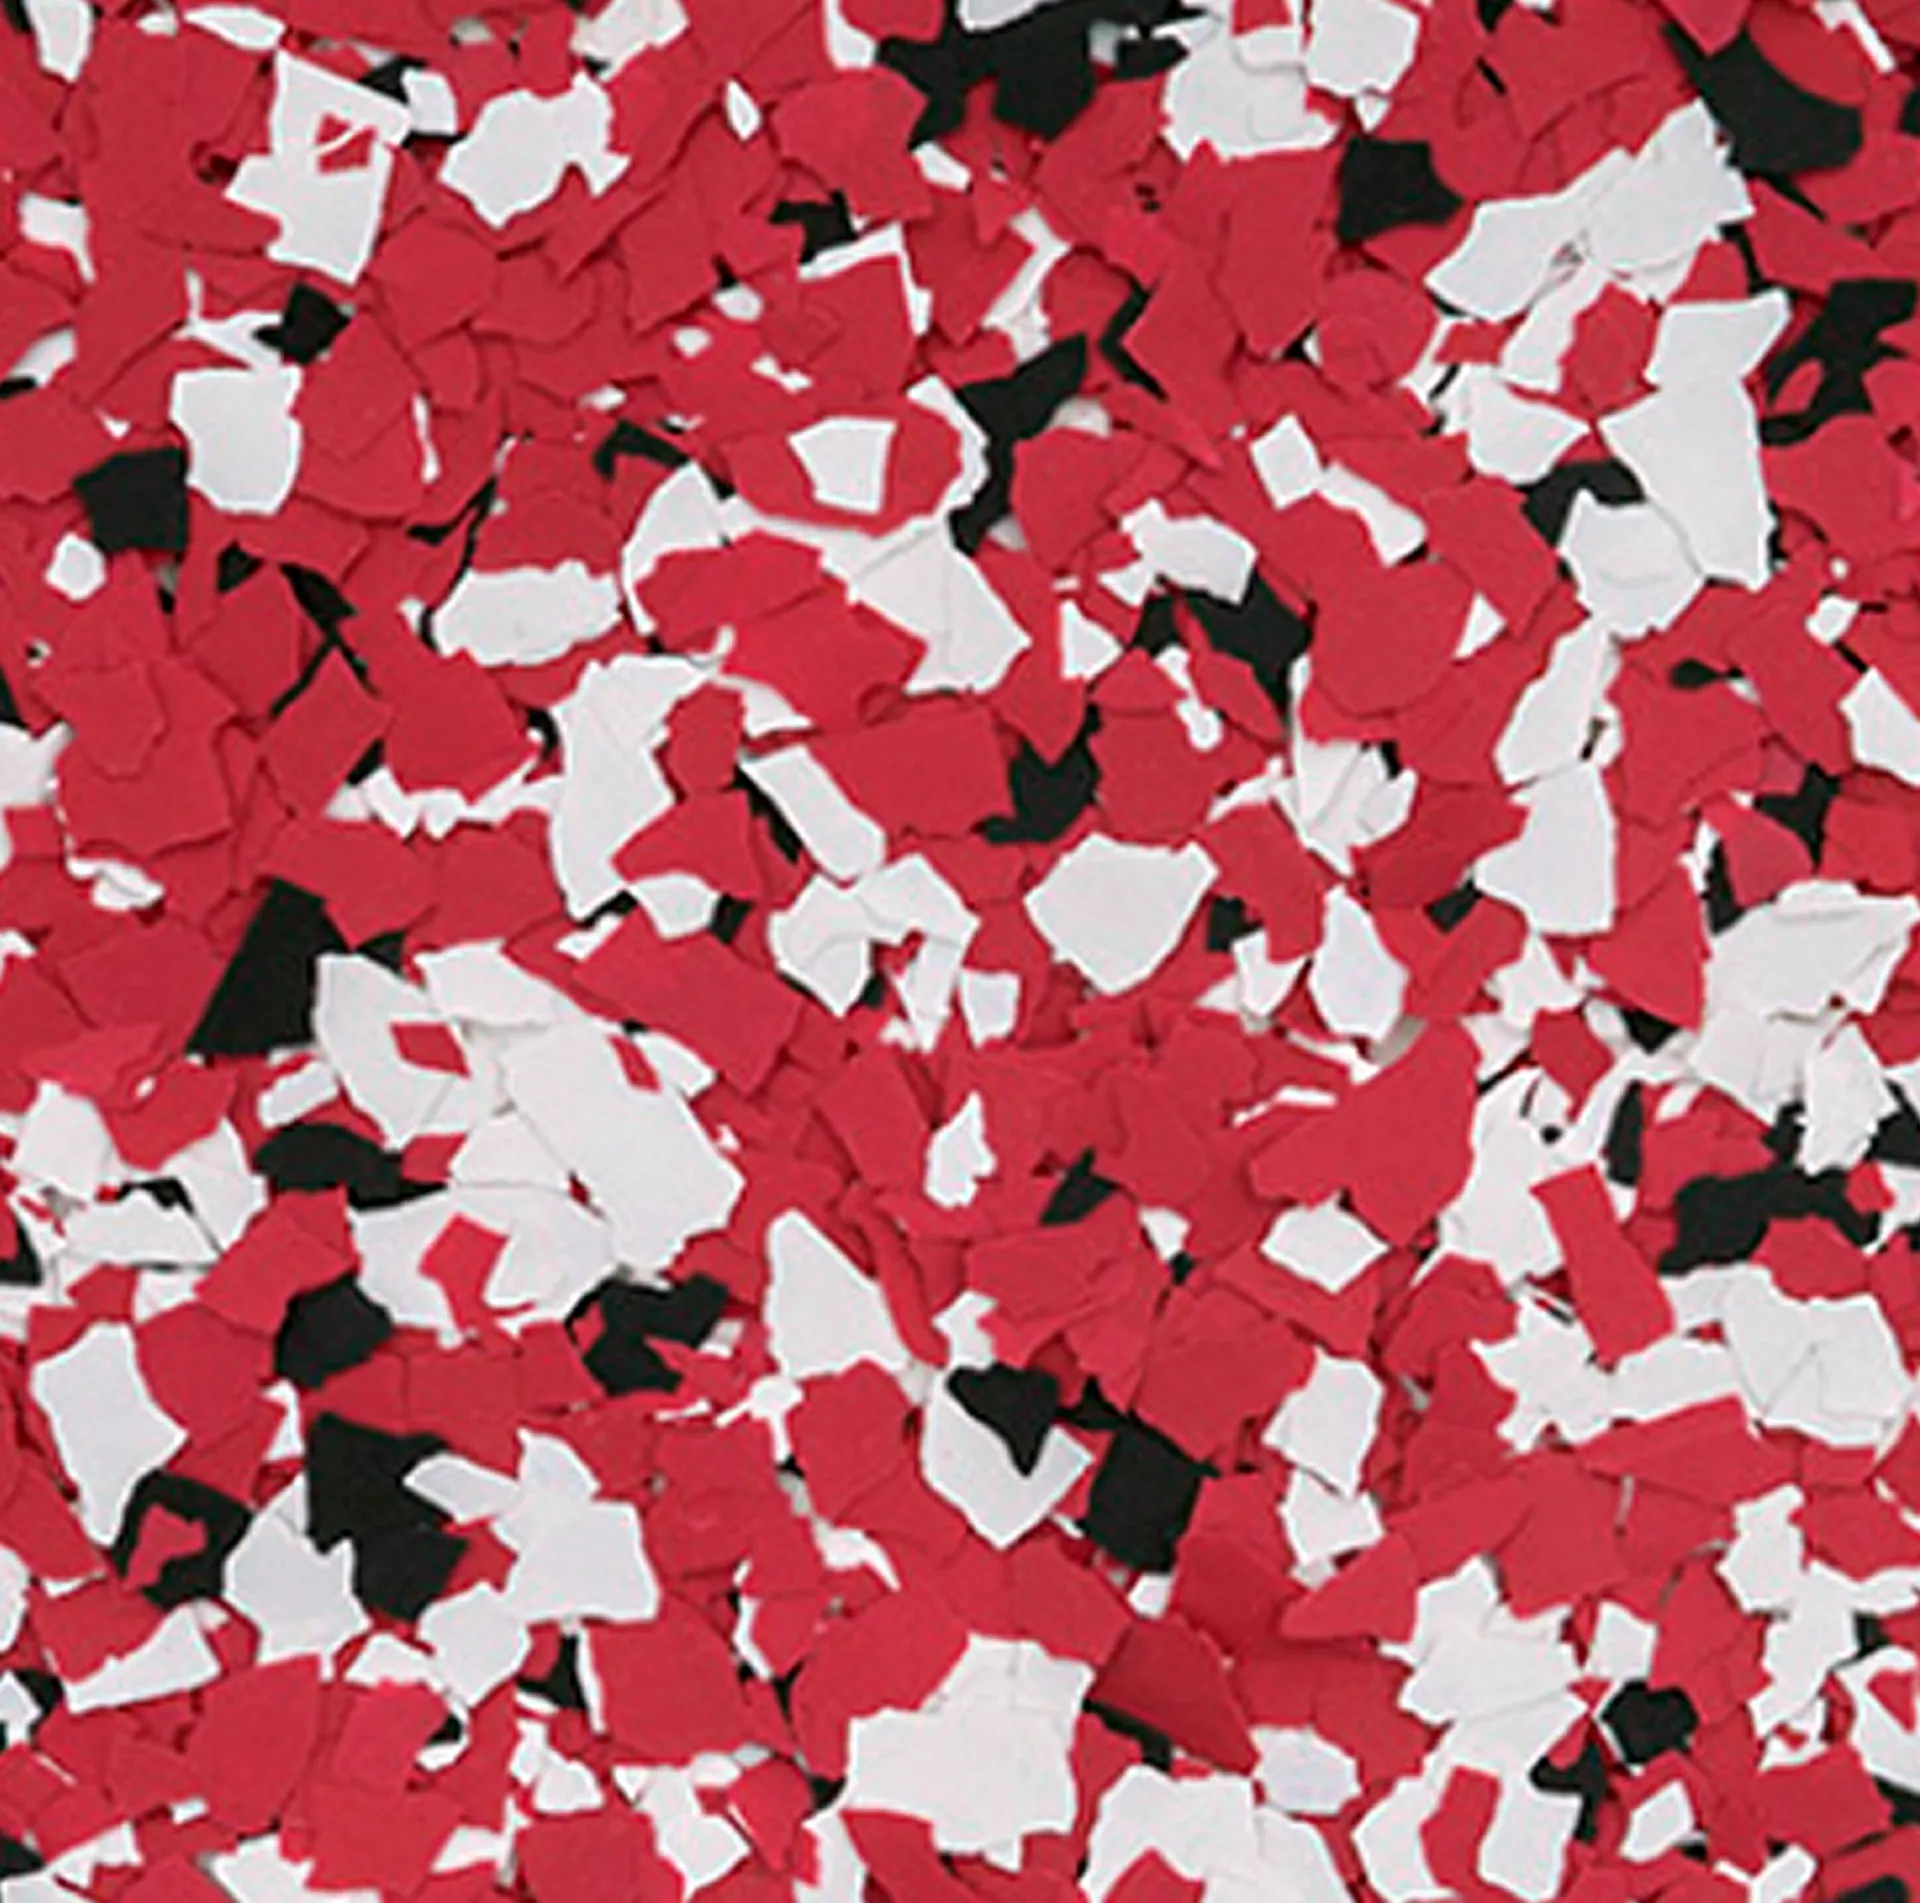
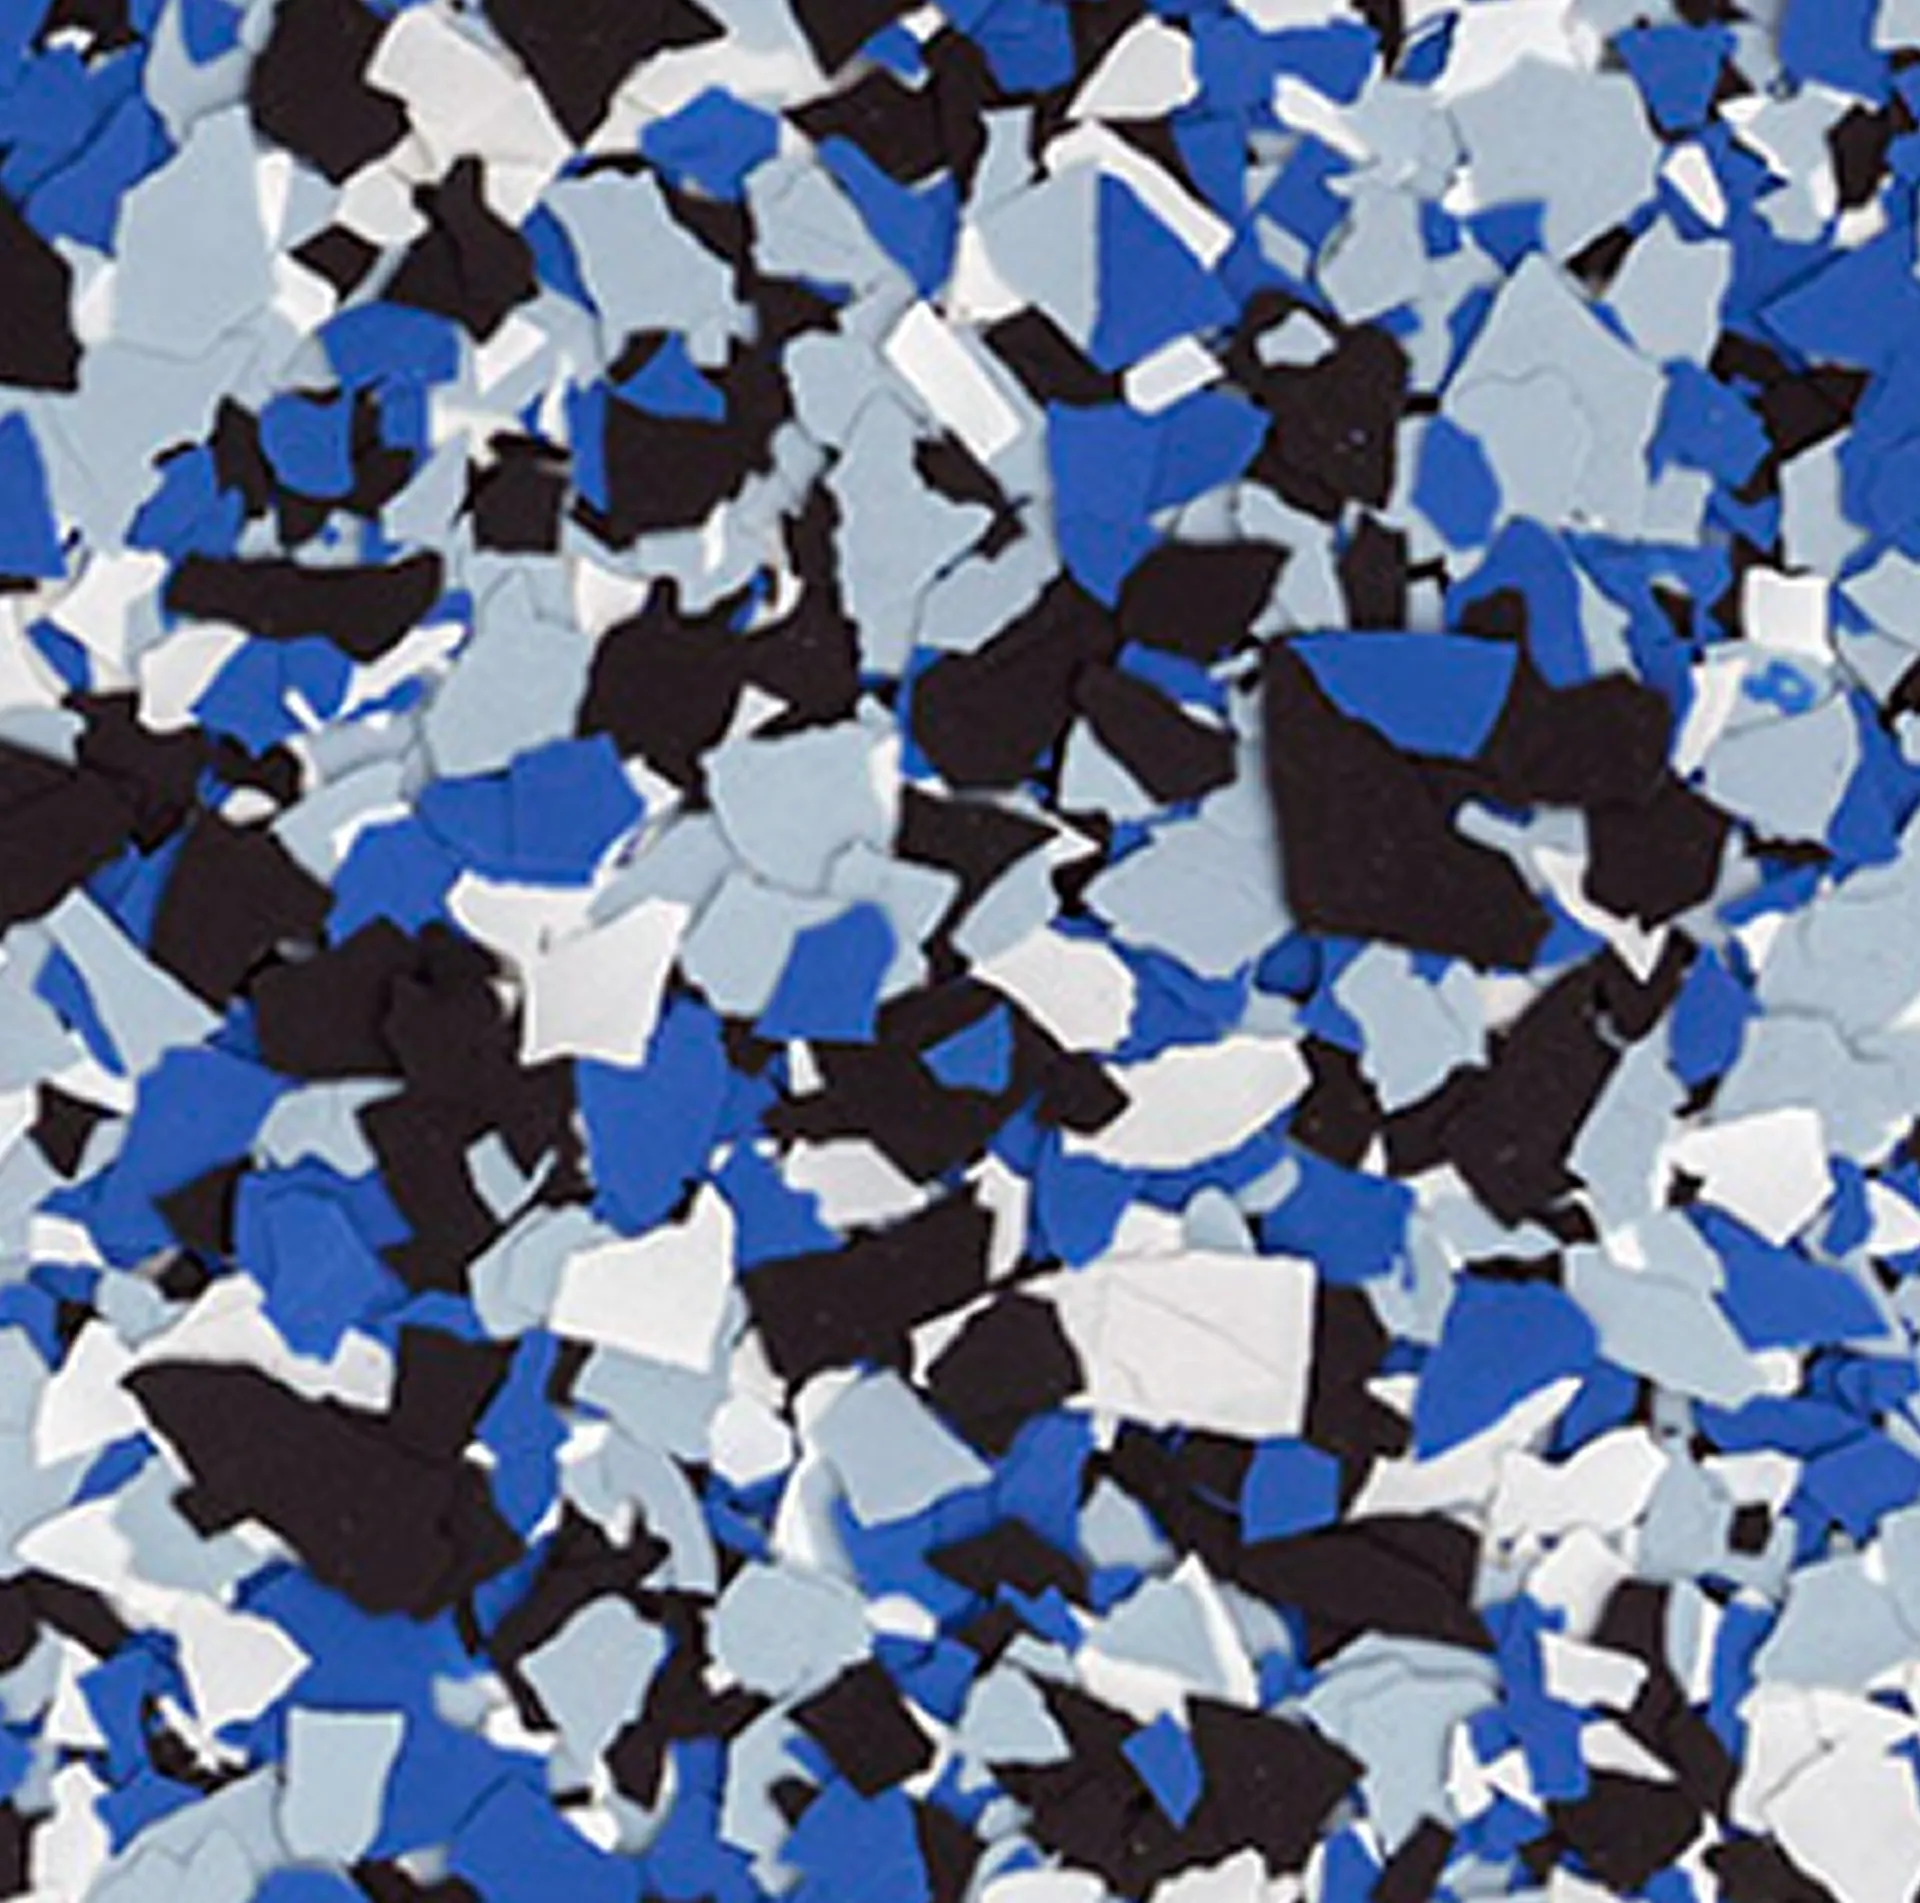
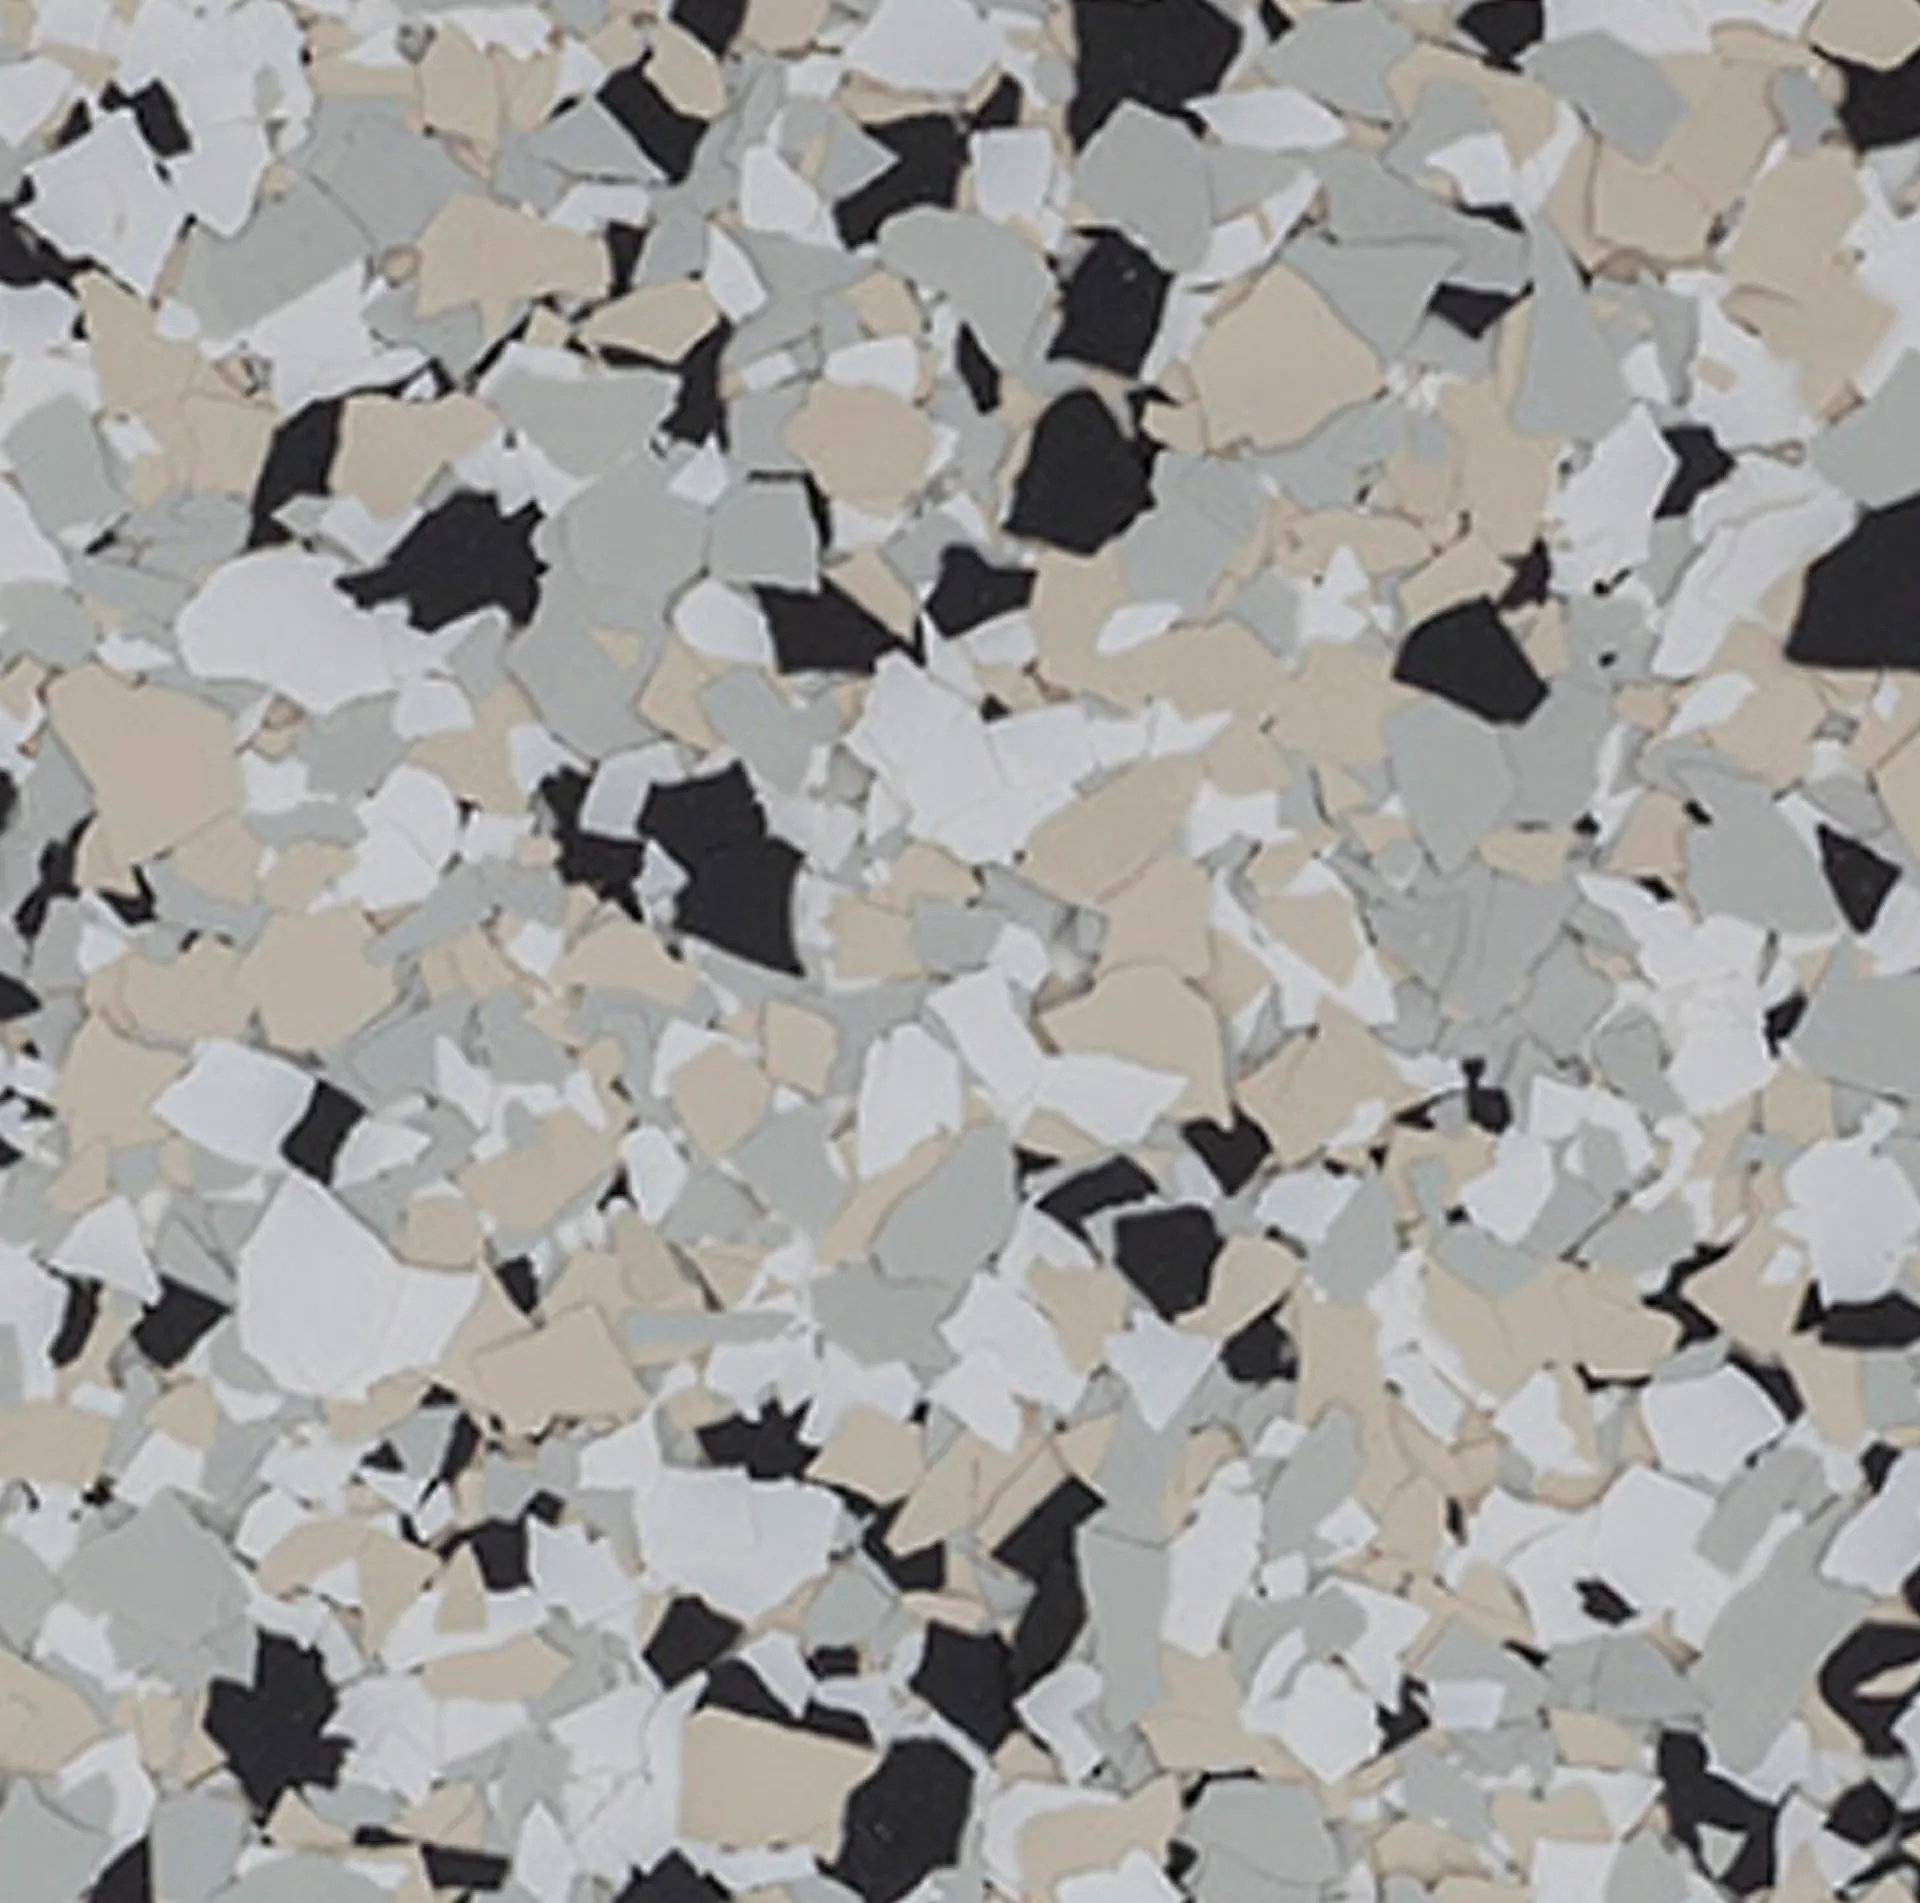
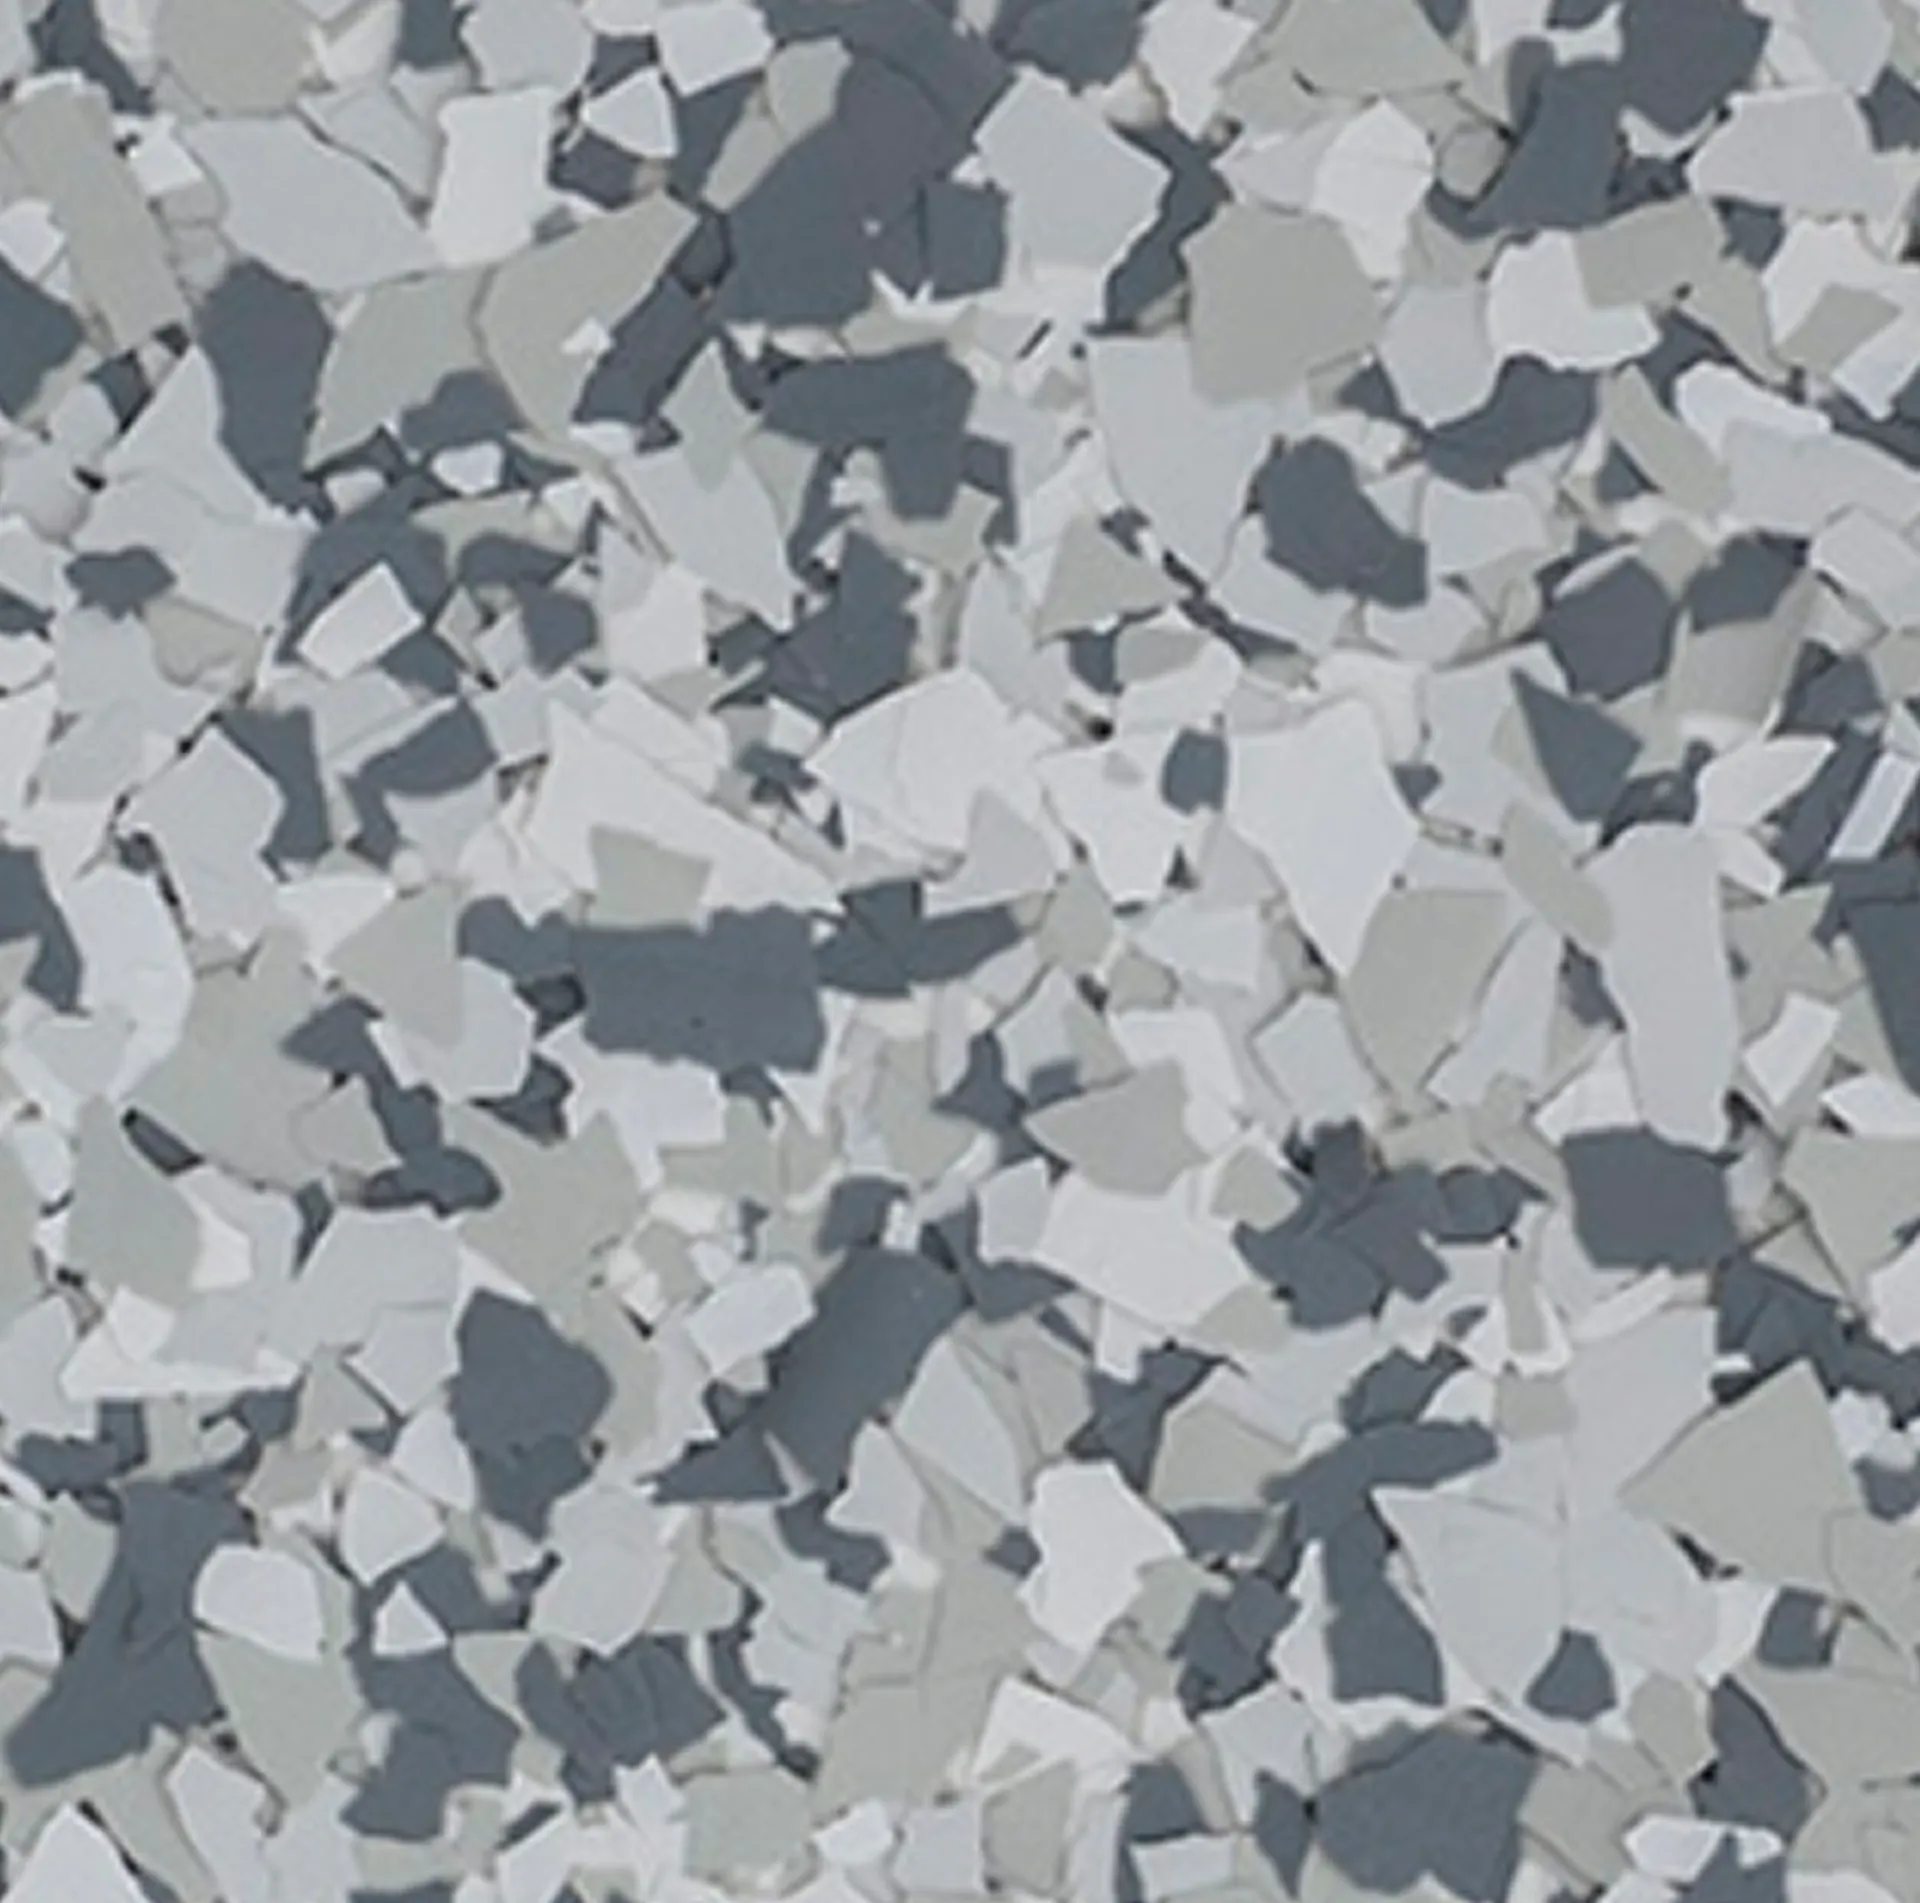
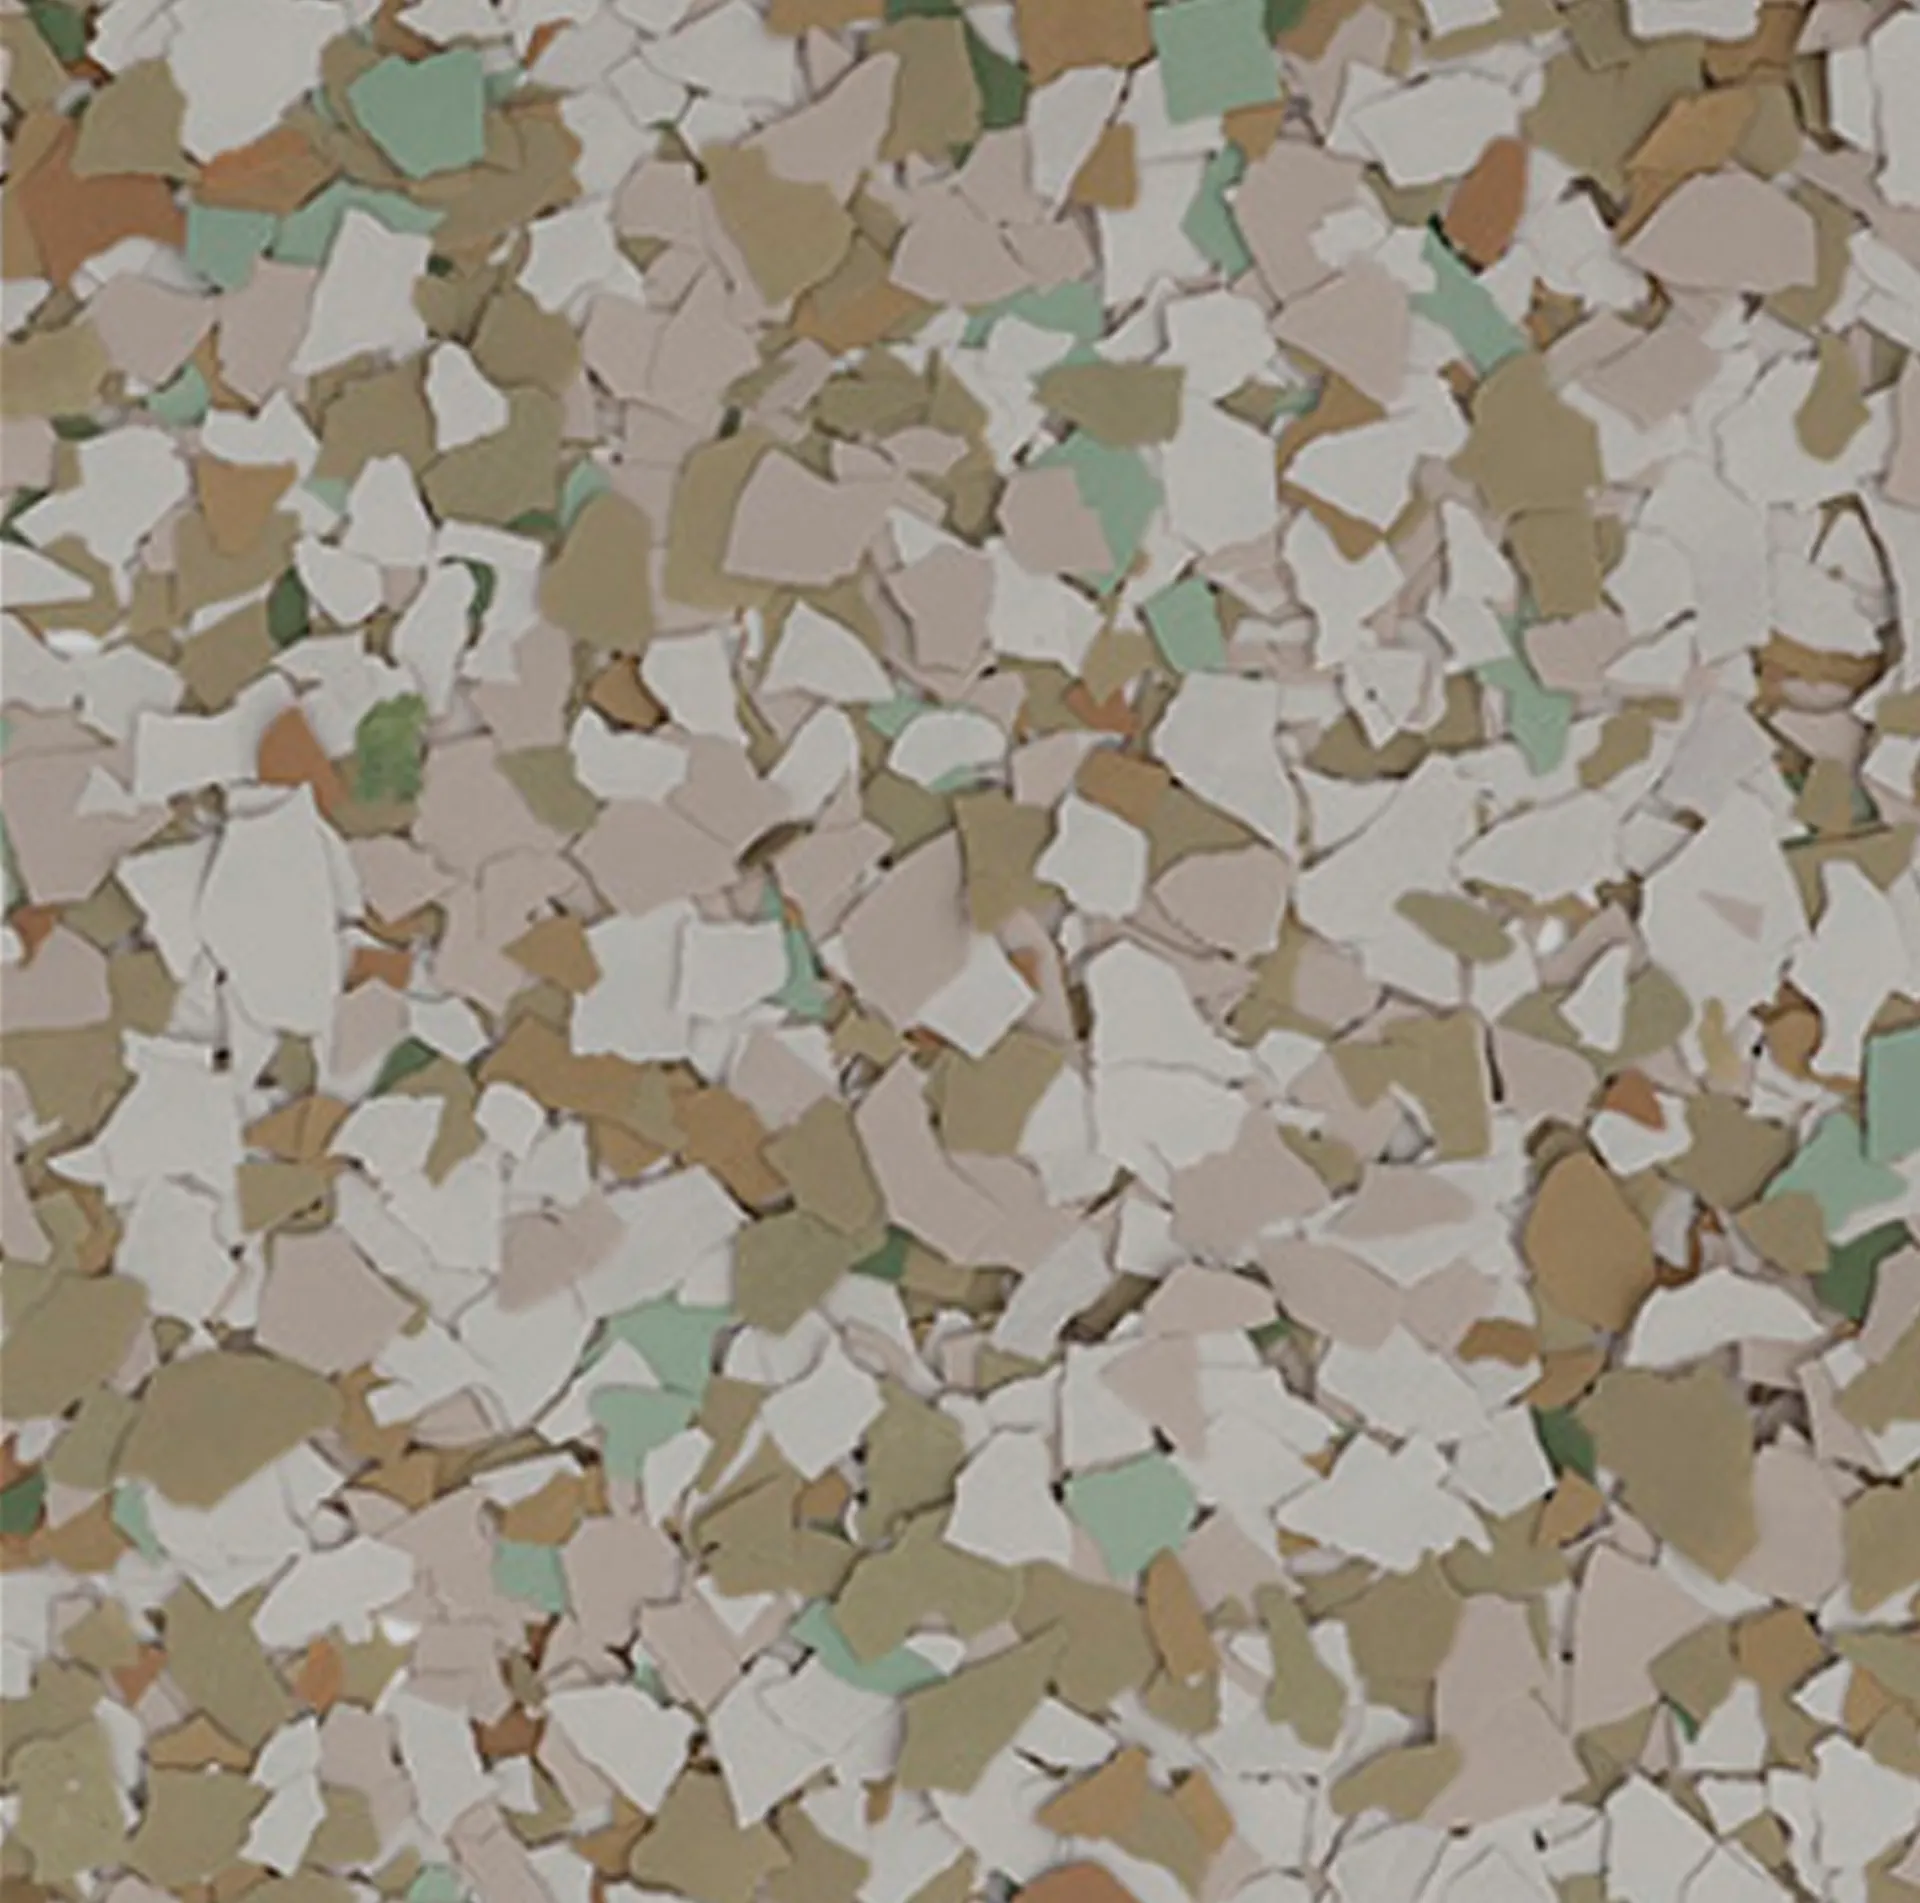
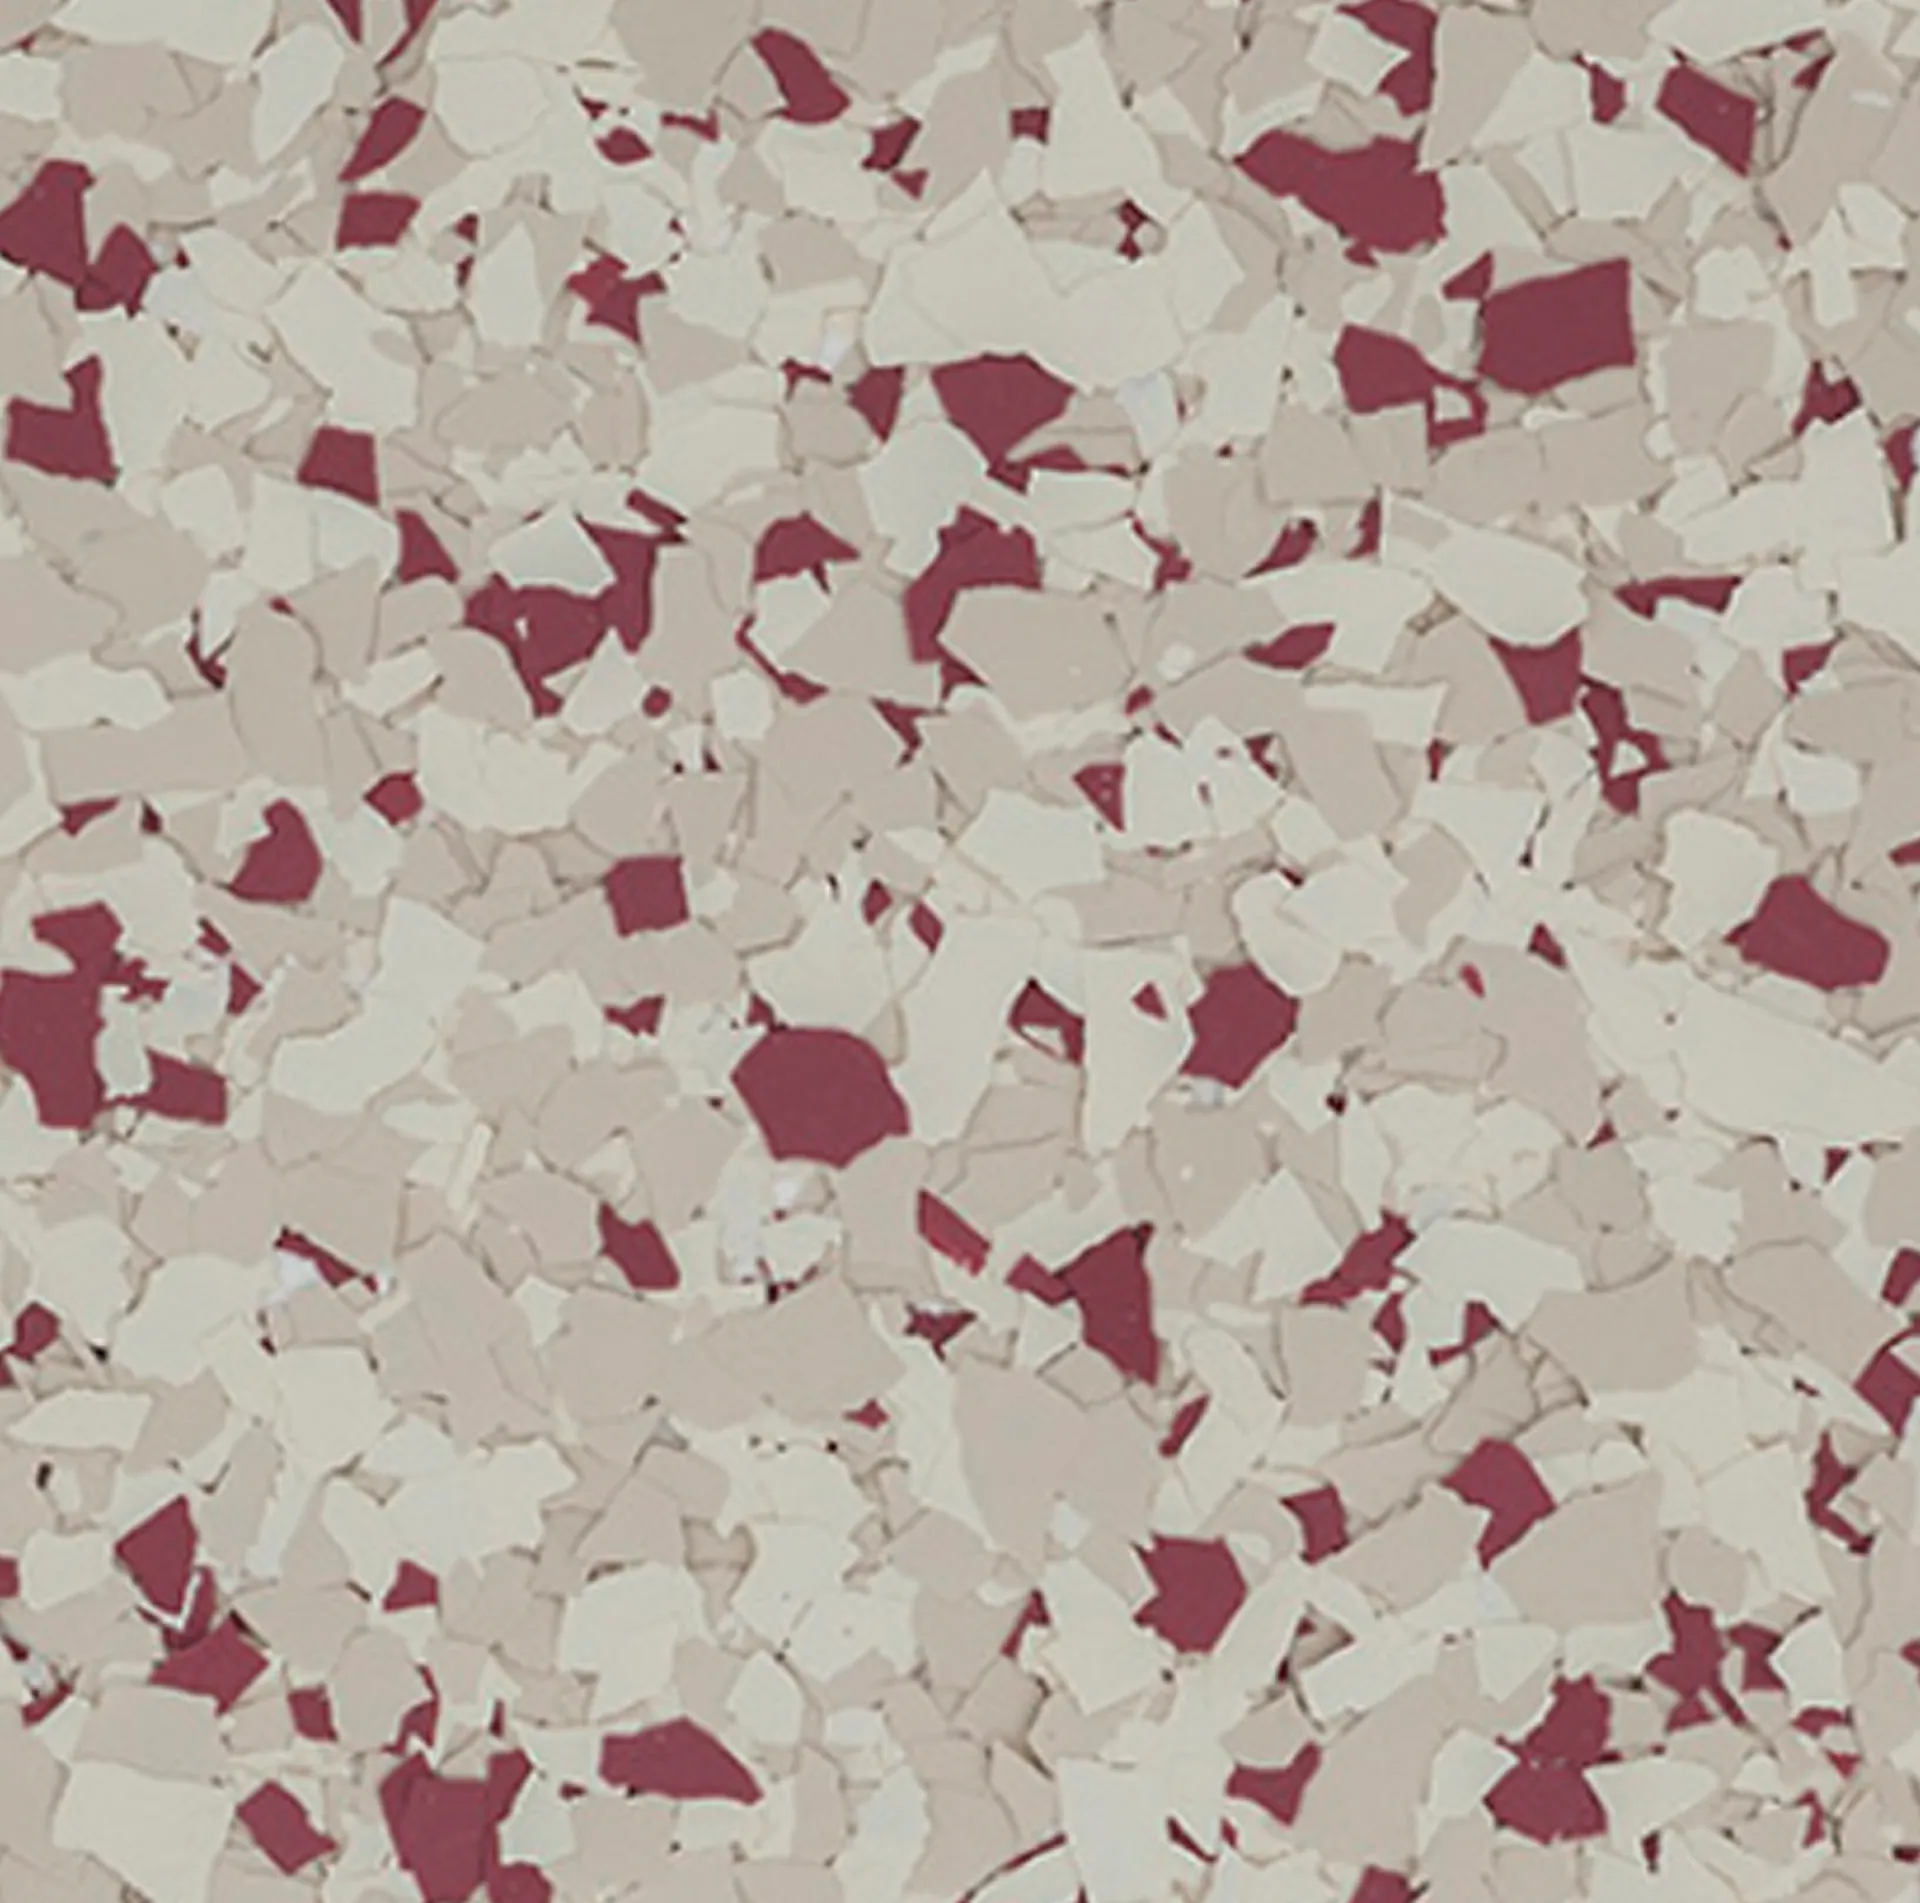
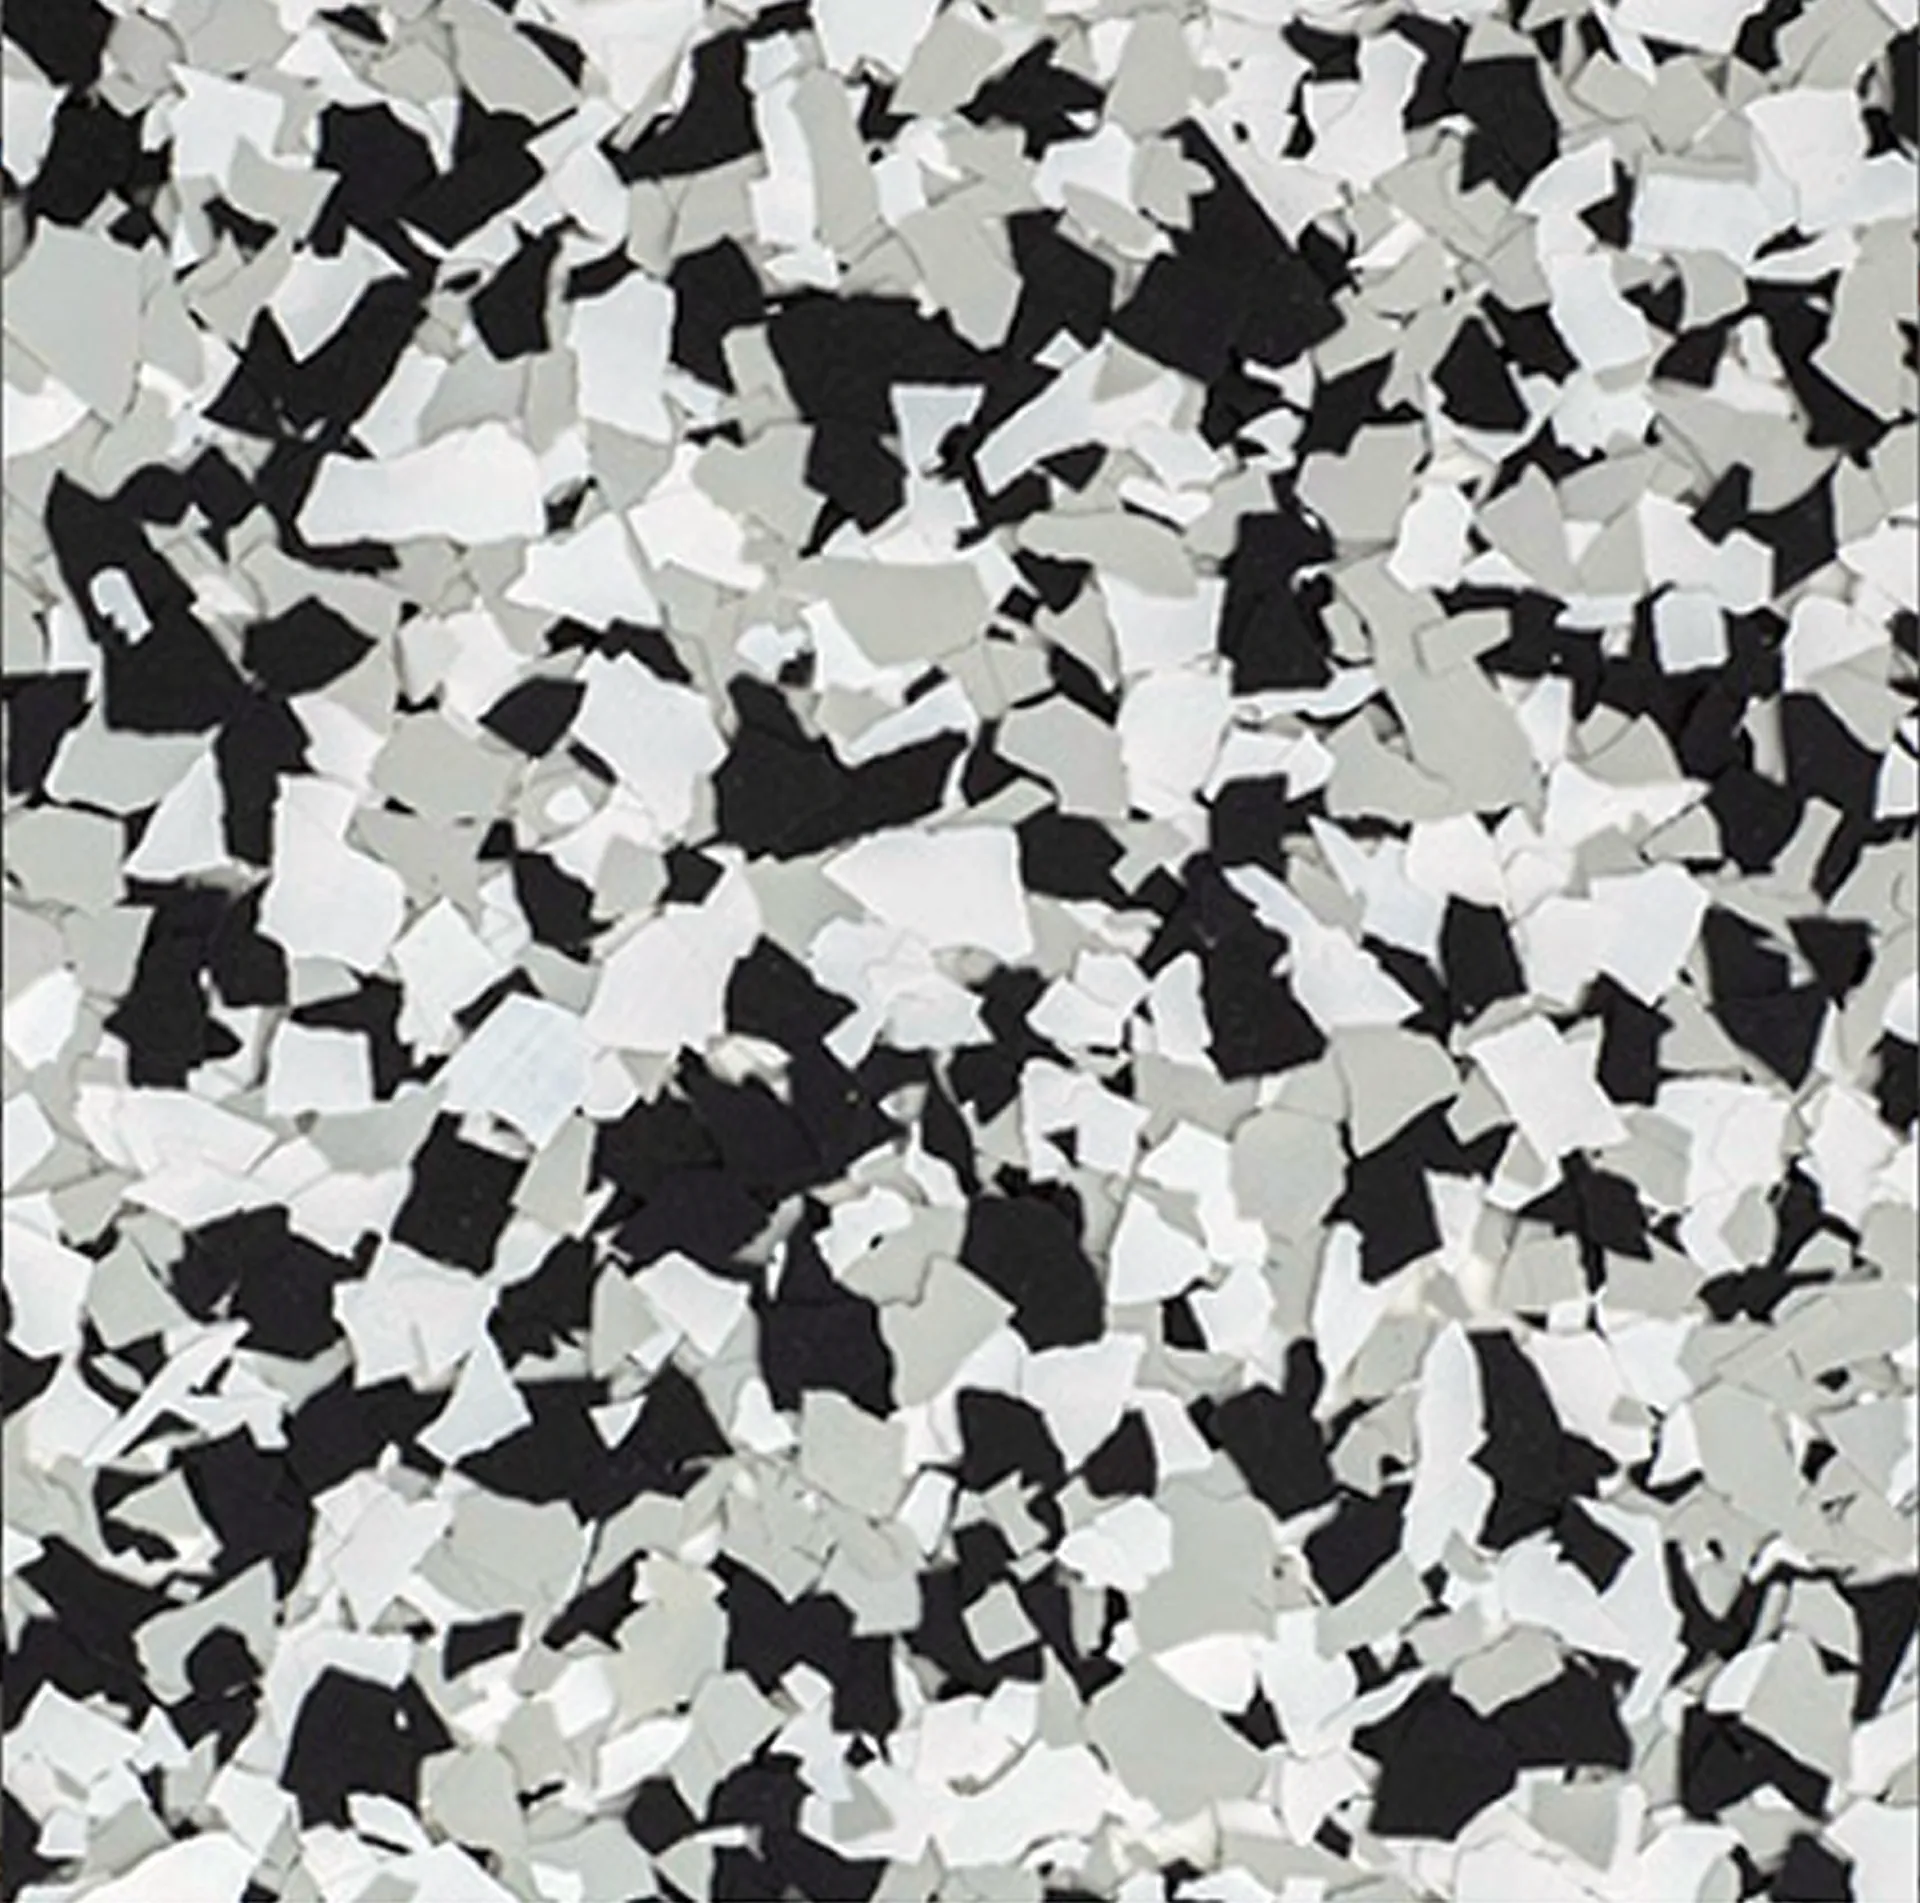
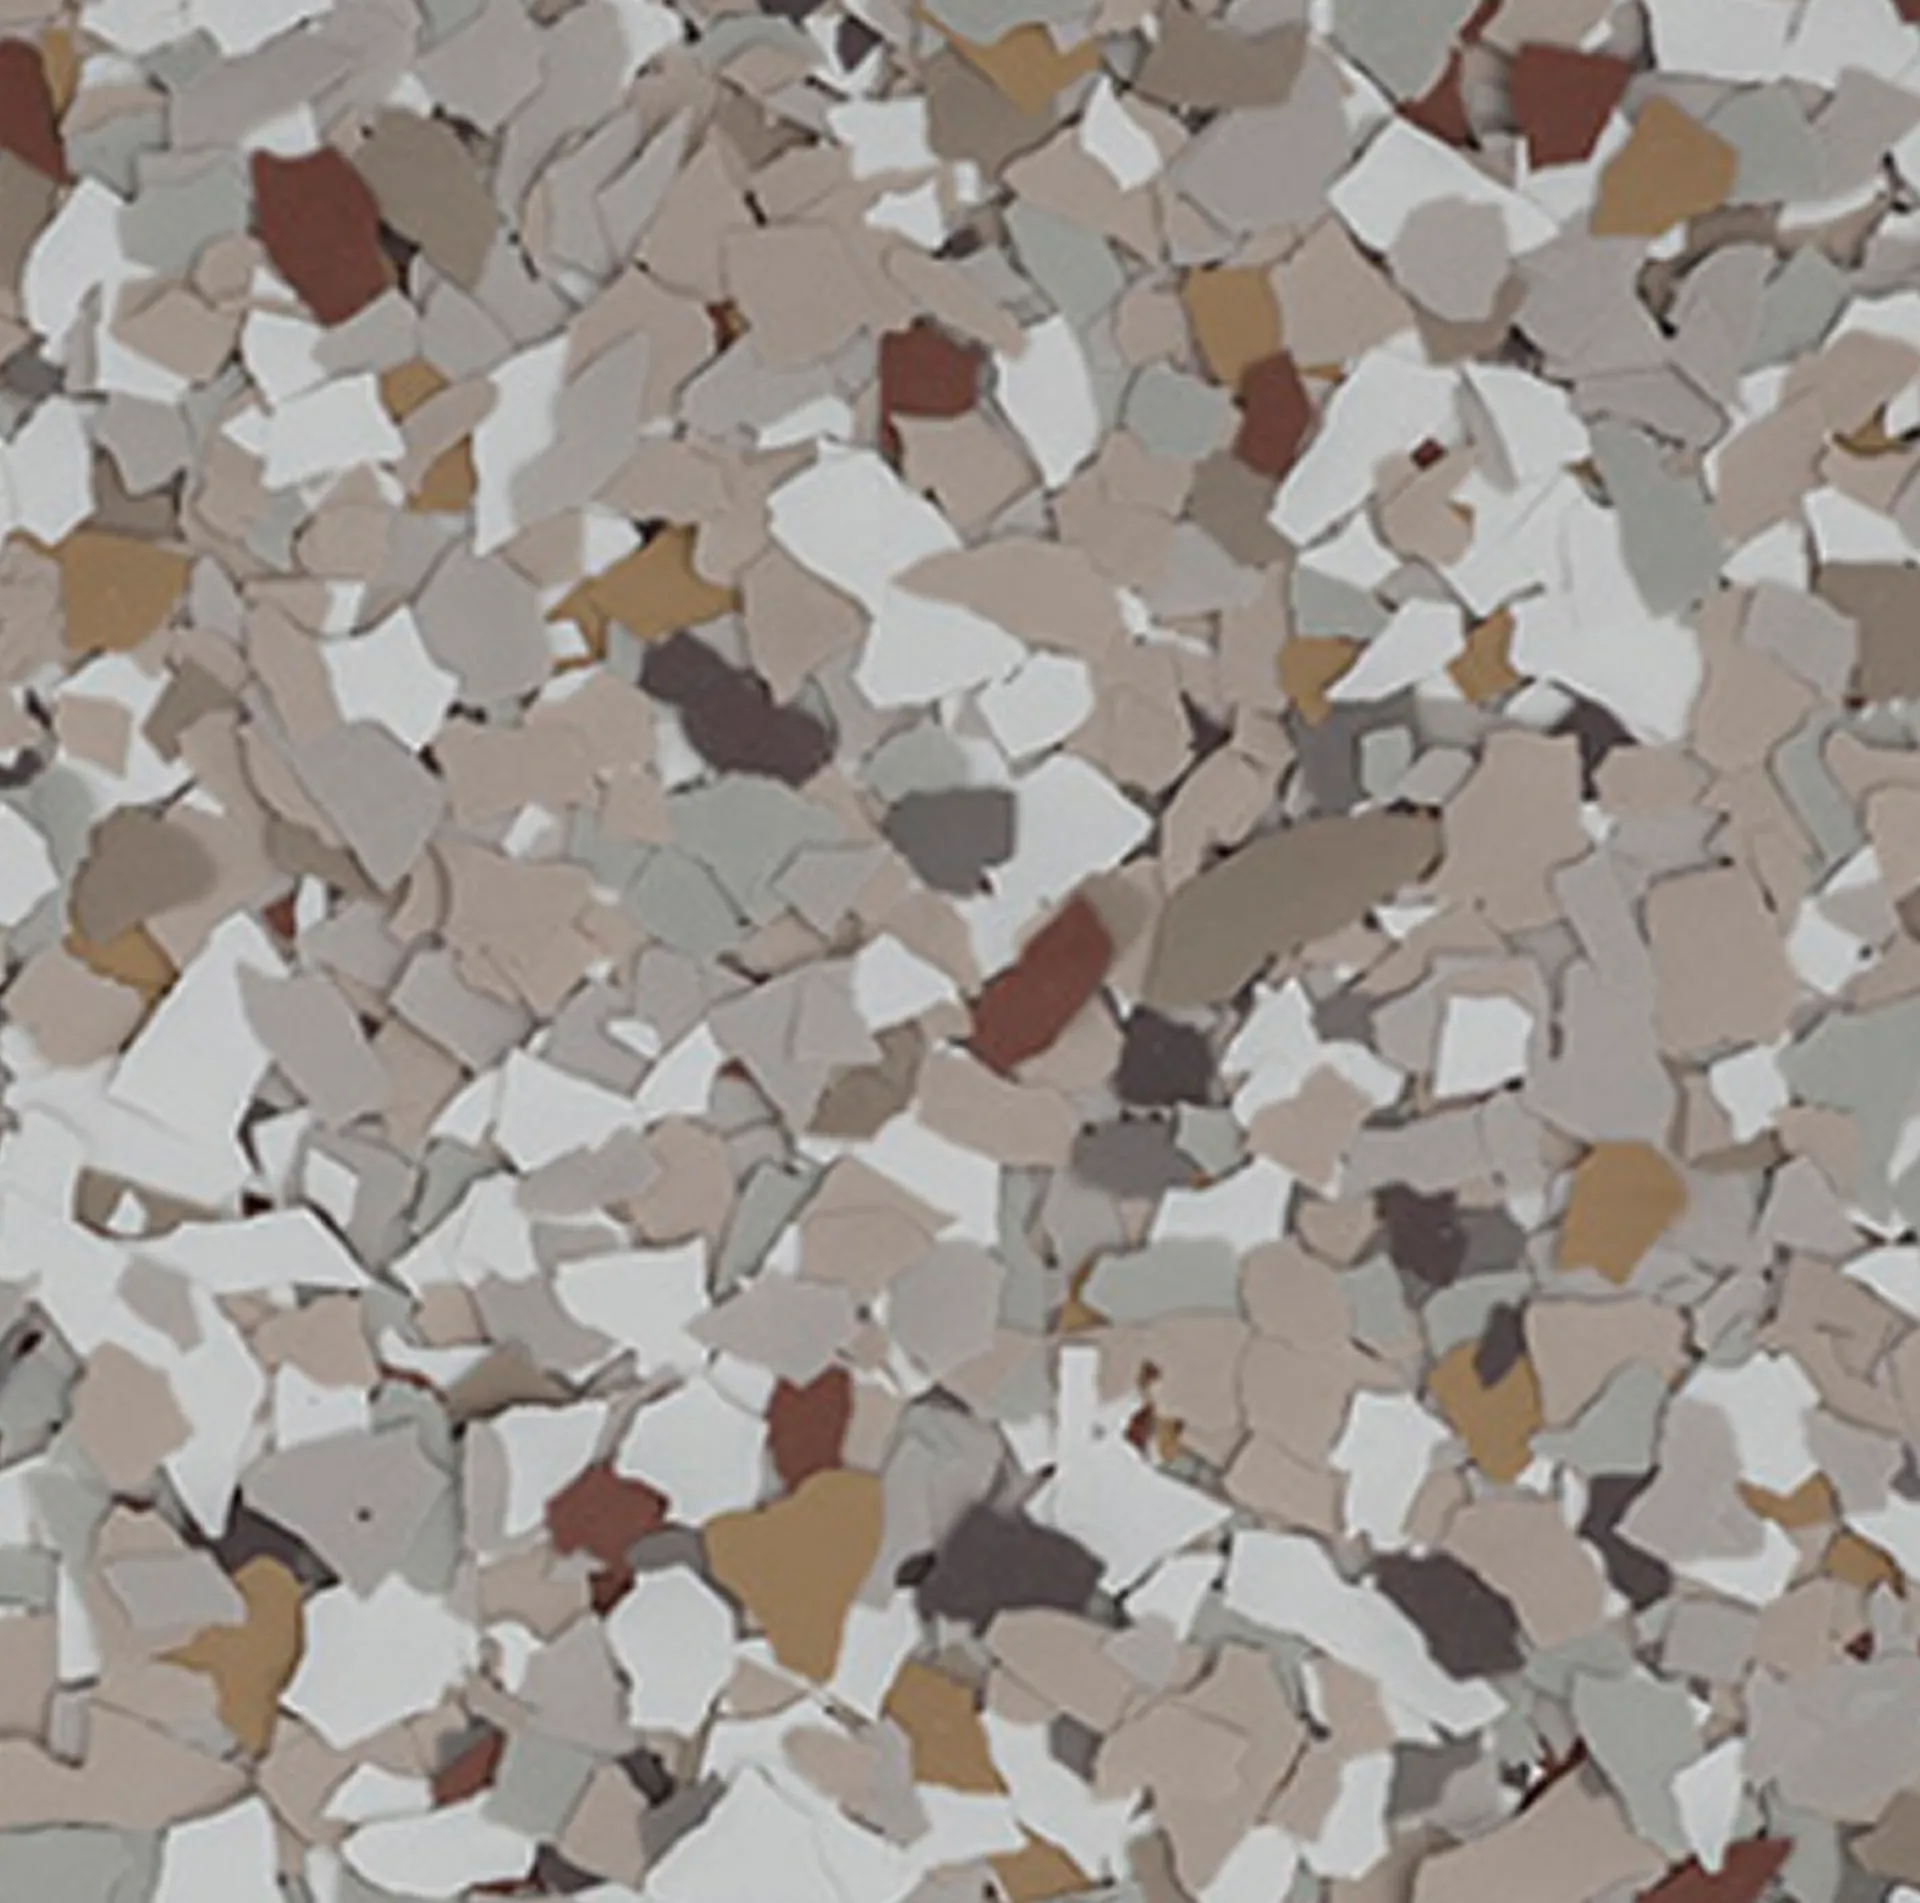
Choose Your Color Blend
Select from 10 premium decorative flake blends. Each is full-broadcast for 100% coverage and a seamless, high-end finish.
Common
Questions
Our Signature Polyaspartic System starts at $2,250 for a single-car garage (approximately 250 sq ft) and from $3,600 for a two-car garage. The Premium Industrial System is priced based on an on-site assessment. We provide free, no-pressure on-site quotes across New Jersey.
How We Install Your Floor — Step by Step
Every floor follows the same disciplined process. No shortcuts. No skipped steps. This is what separates a floor that lasts 15 years from one that peels in 3.
Step 1
Diamond Grinding & Surface Preparation
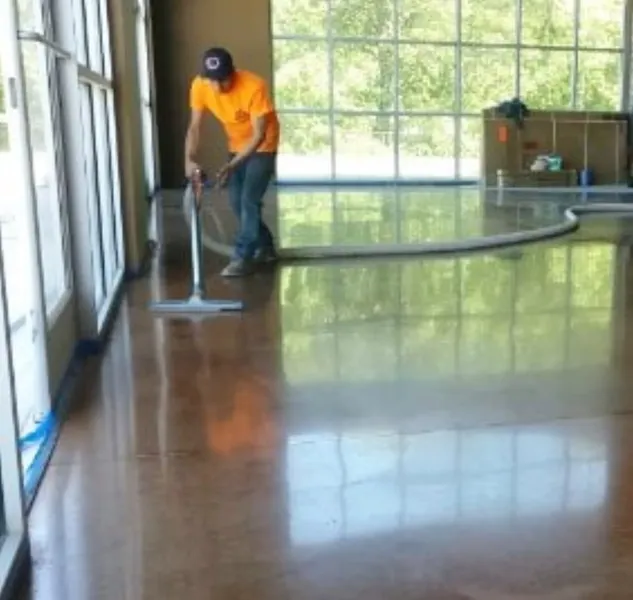
We grind the entire concrete surface with professional diamond tooling to create the proper Concrete Surface Profile (CSP). This opens the pores of the concrete for maximum adhesion and removes any existing coatings, sealers, or contaminants. Diamond grinding is the only method we use — no acid etching, ever.
Step 2
Crack & Spall Repair
Every crack, chip, and spall is filled with professional-grade repair mortar before coating begins. We do not coat over damage and hope for the best. Proper crack repair is what separates a floor that lasts from one that fails.
Step 3
Moisture Vapor Barrier (Premium System Only)
For the Premium Industrial System, we apply a moisture vapor barrier epoxy coat before the base coat. This is critical for slabs with elevated moisture vapor emission — the number one cause of coating delamination. We test every slab. If moisture is present, we address it. No exceptions.
Step 4
Polyaspartic Base Coat Application
A commercial-grade polyaspartic base coat is rolled onto the prepared surface. This is not a hardware-store product — it is the same formulation used in industrial and commercial facilities. The base coat bonds directly to the open concrete profile created by diamond grinding, forming a permanent mechanical and chemical bond.
Step 5
Full-Broadcast Decorative Flake
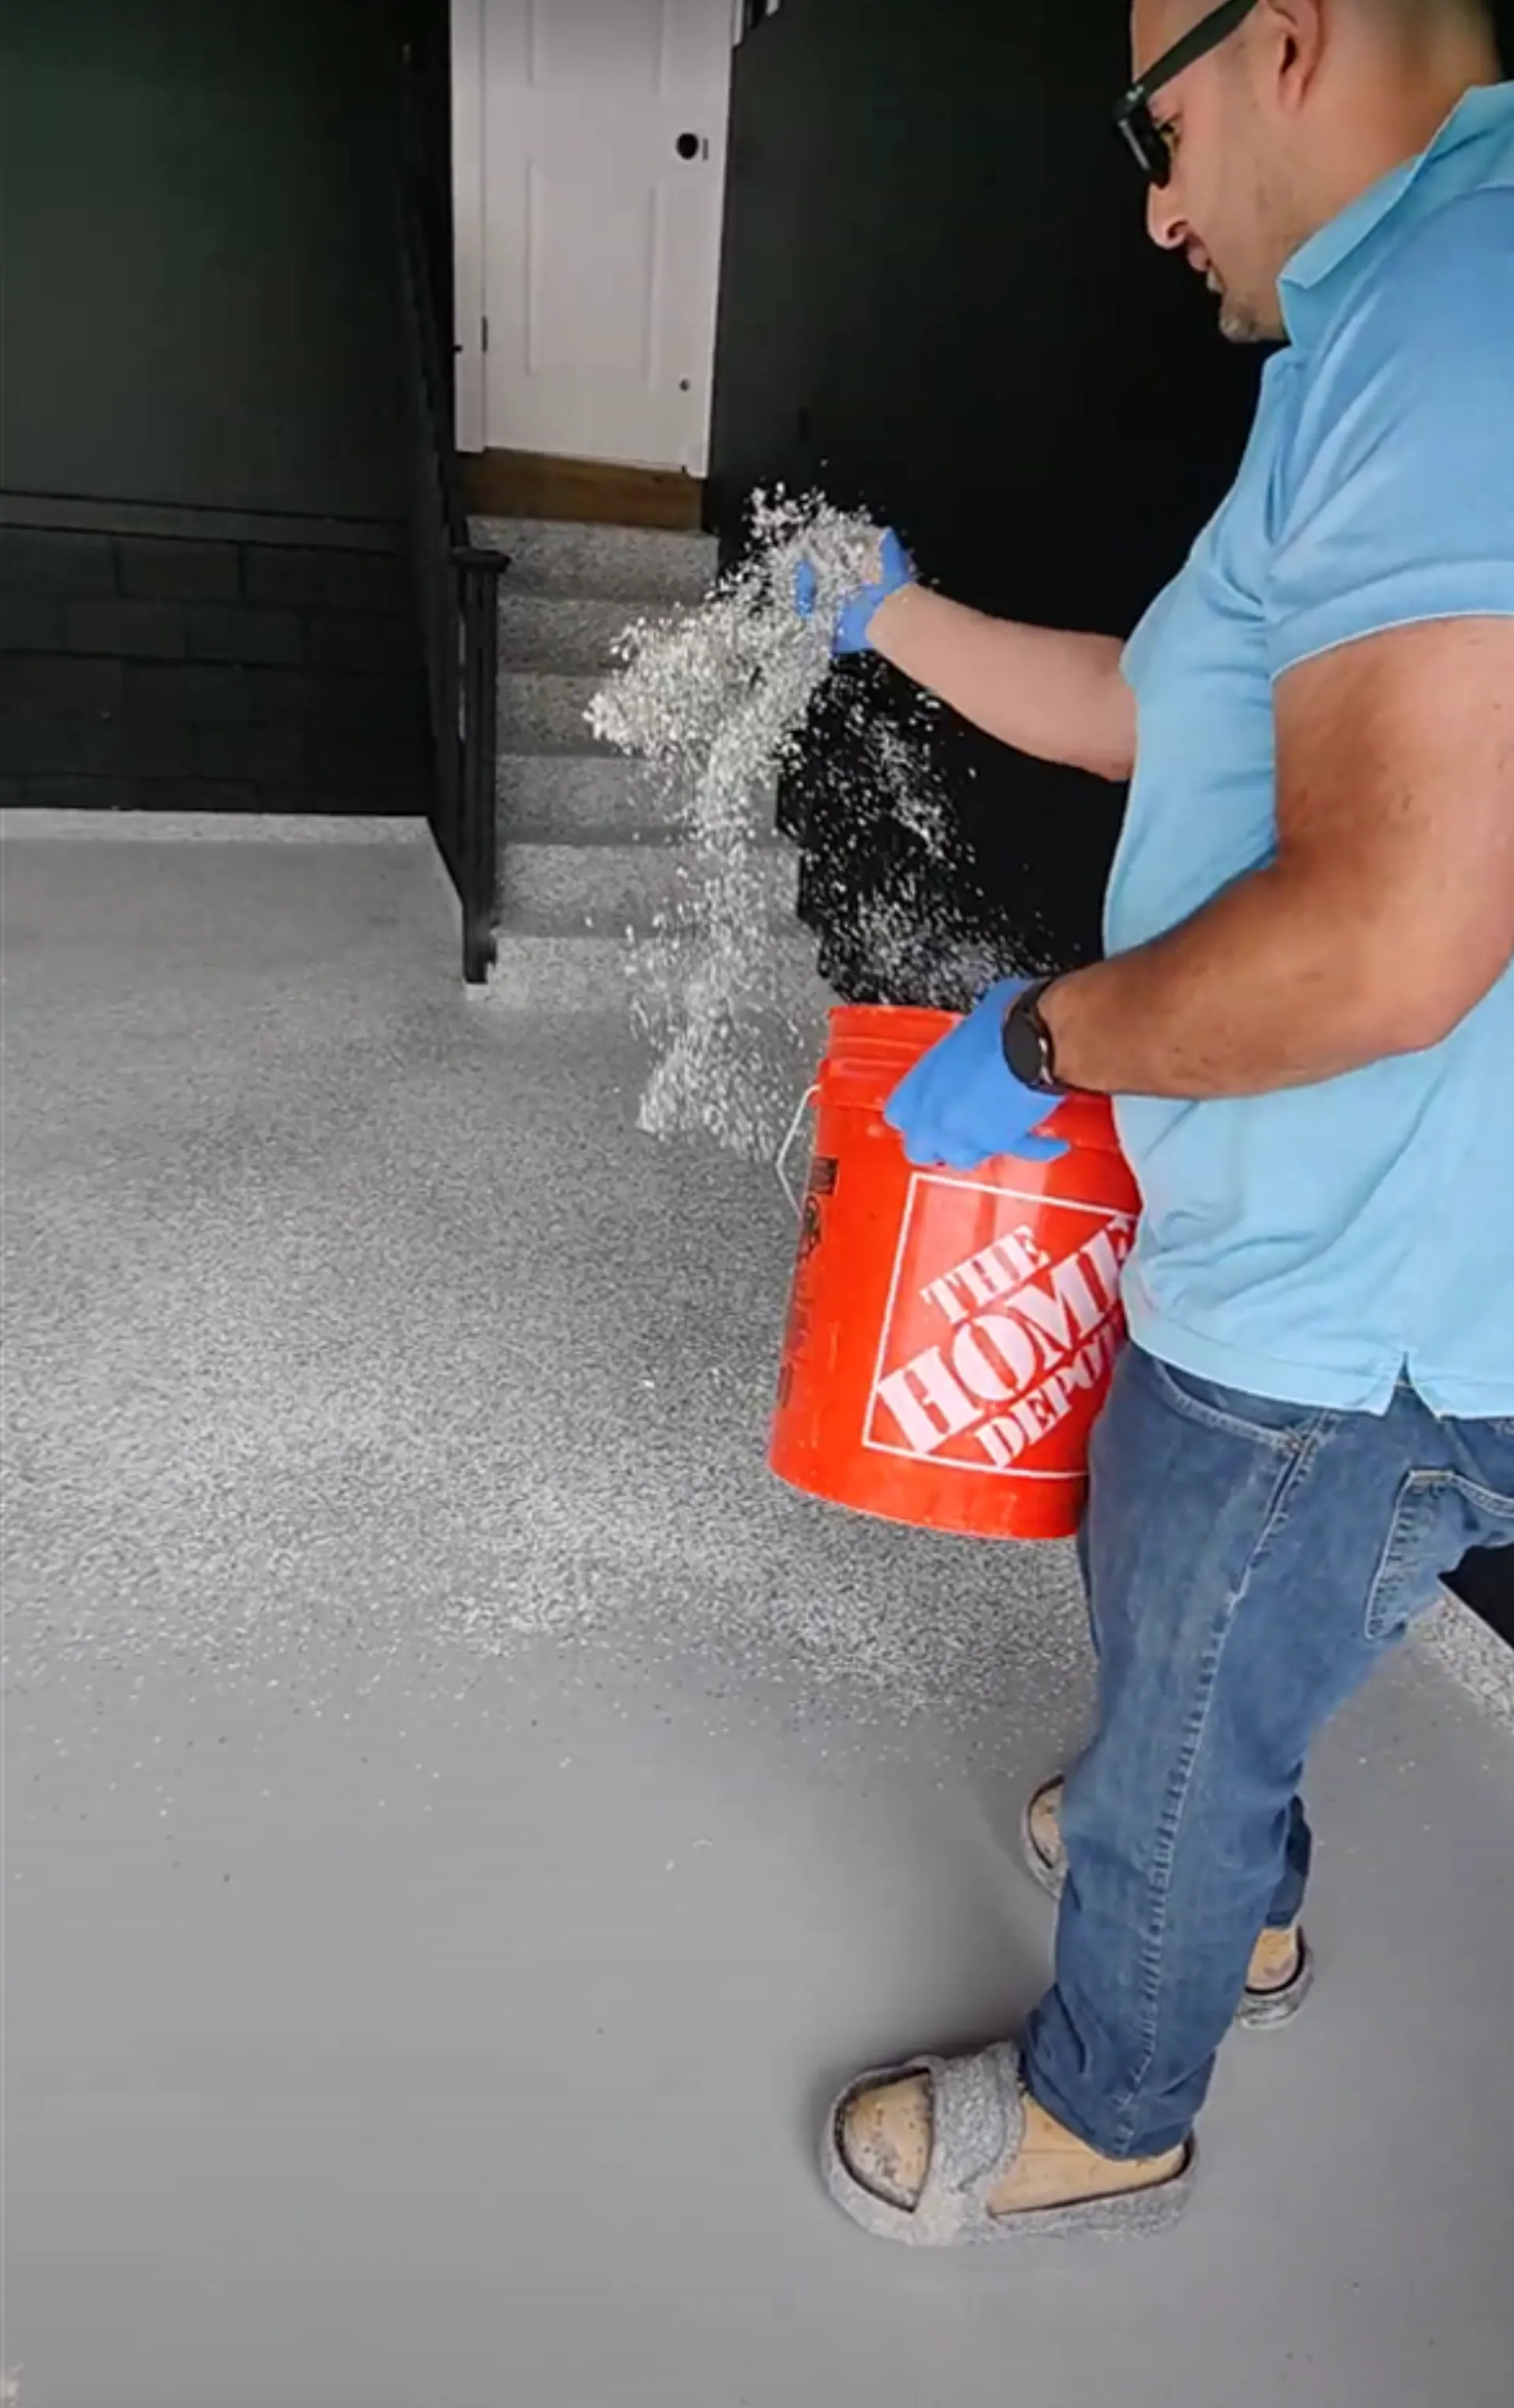
Decorative paint flakes are broadcast across the entire floor at full rejection — meaning the surface is completely covered with no bare spots. This creates the seamless, high-end finish that defines a professional installation. You choose from over 10 color blends. The flakes also create a natural texture that provides traction underfoot.
Step 6
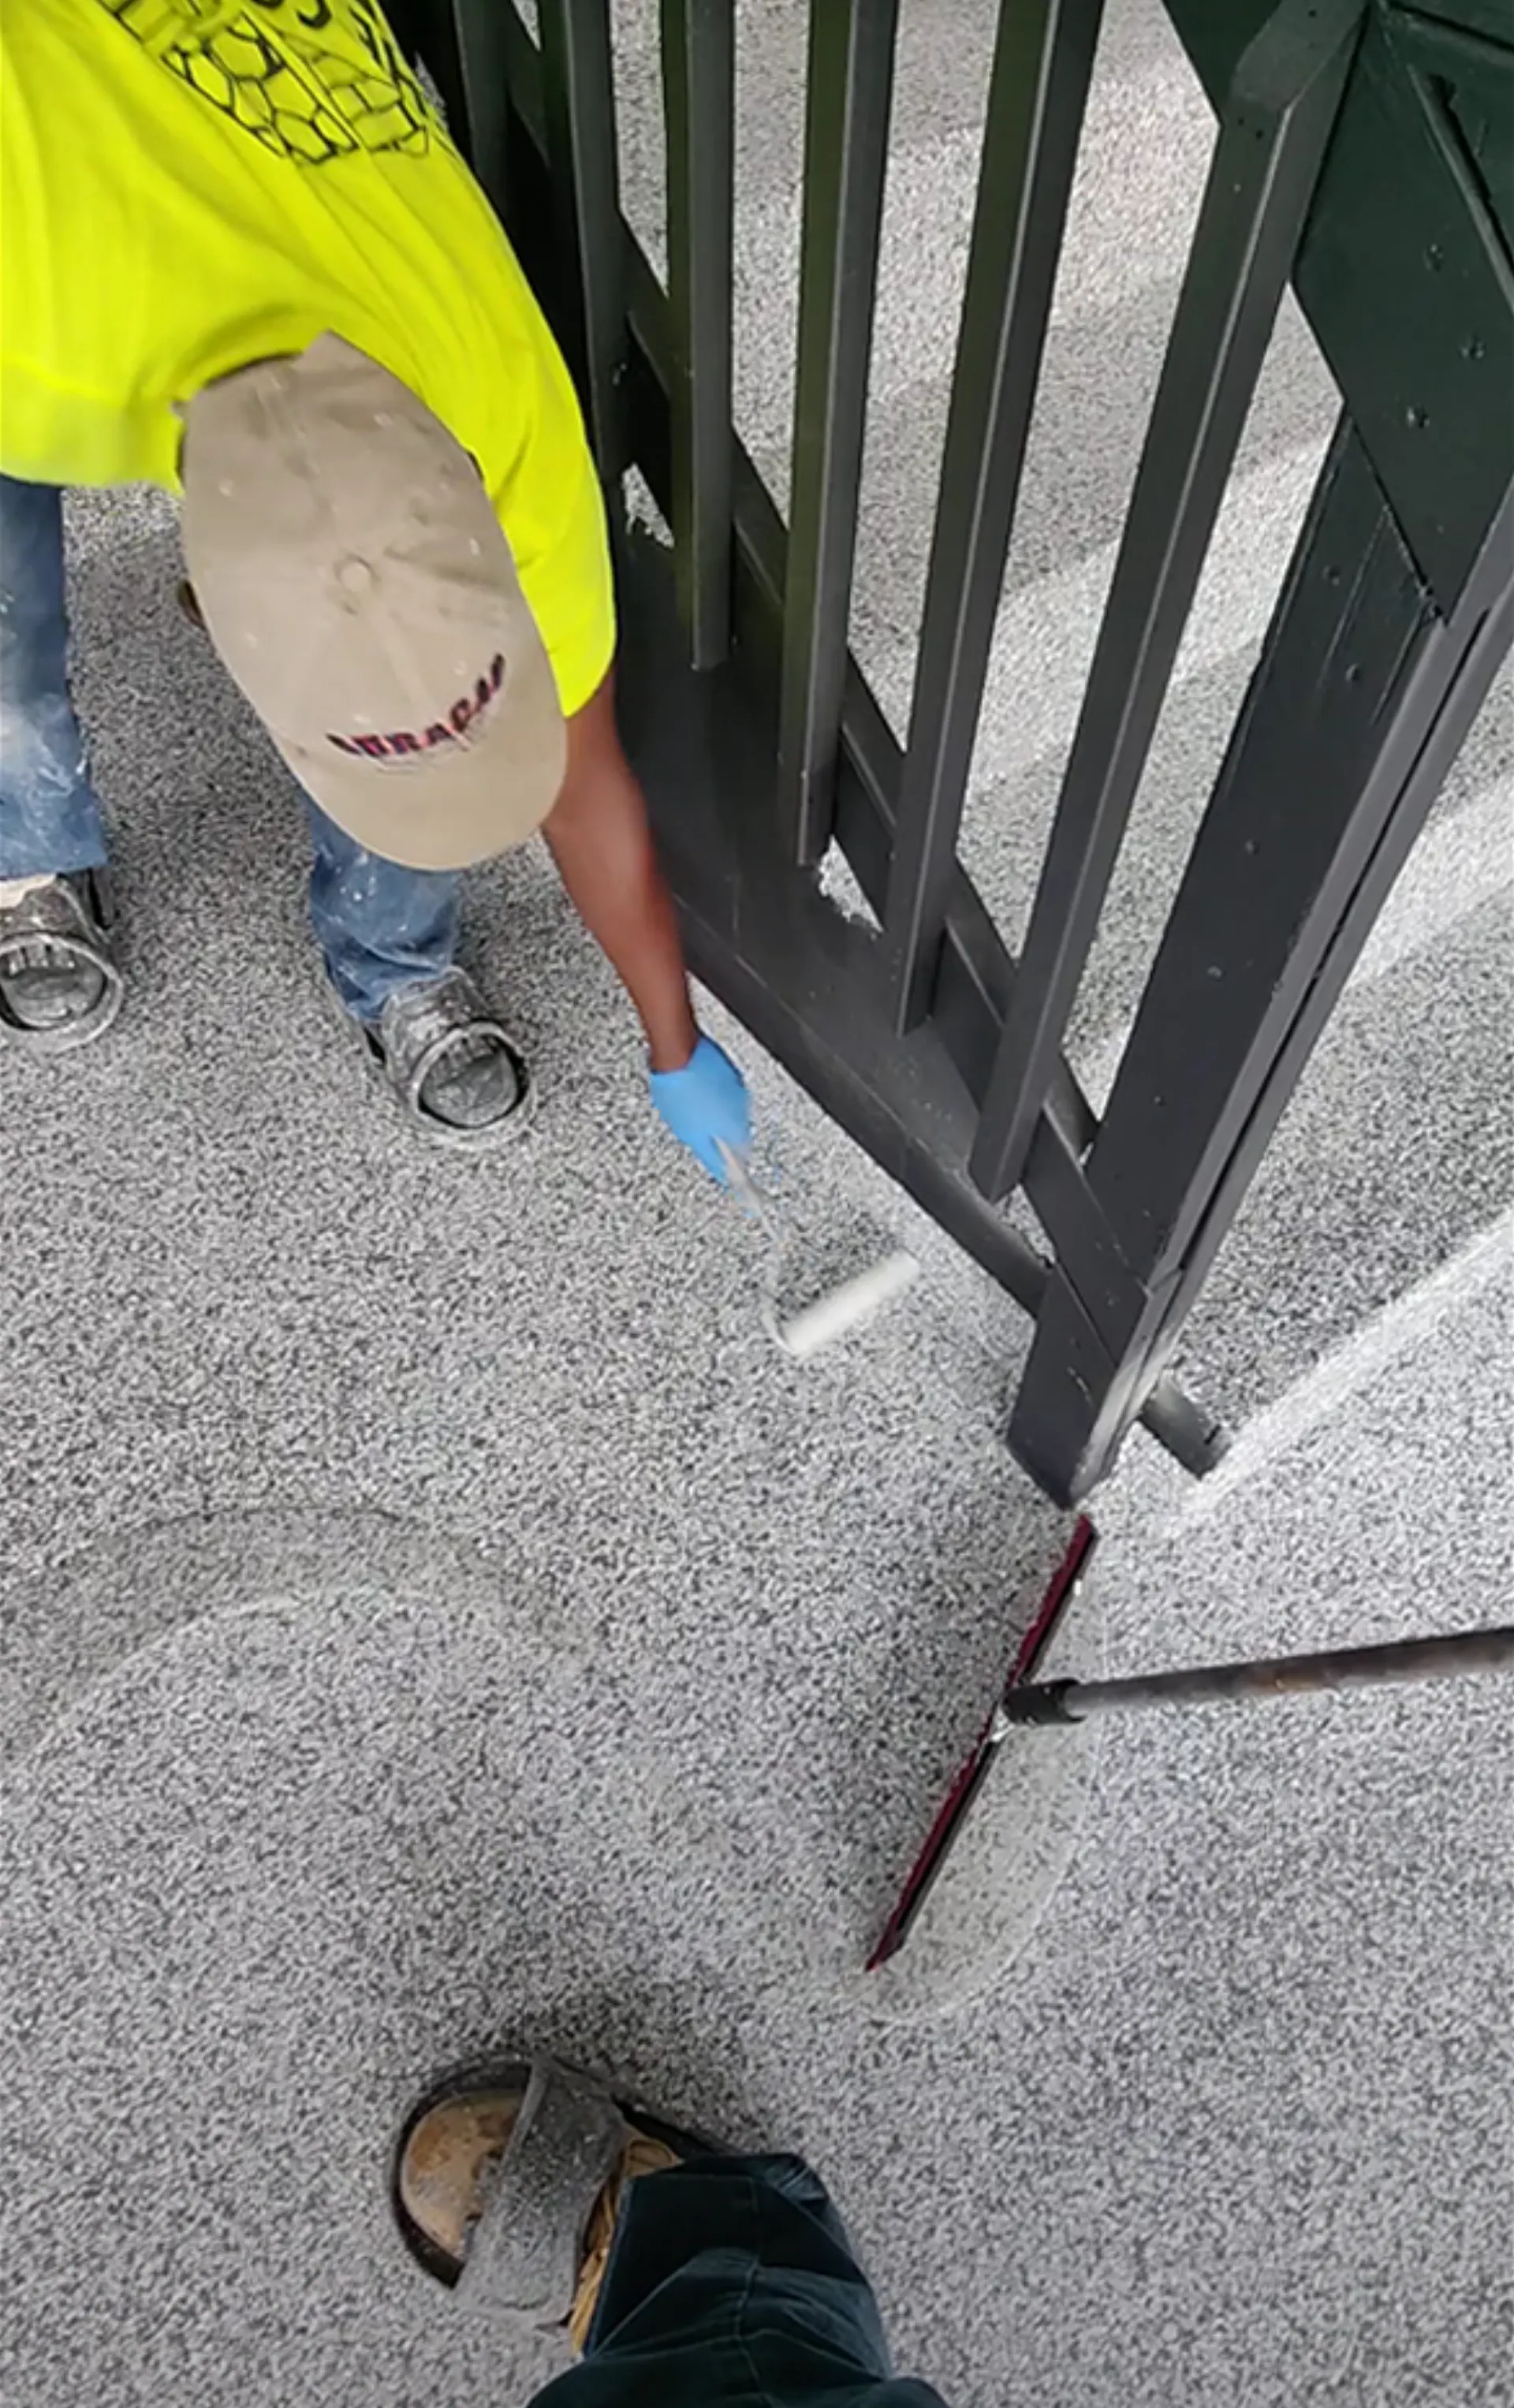
Scrape & UV-Stable Polyaspartic Topcoat
Once the base coat and flakes have cured, we scrape the surface smooth to remove any standing flakes, then apply a UV-stable polyaspartic clear topcoat. This final layer locks in the flakes, provides chemical and abrasion resistance, and delivers the high-gloss finish. Unlike epoxy topcoats, polyaspartic will not yellow with UV exposure.
Ready to Get
Your Floor Done Right?
Fill out the form and we will reach out to schedule your free, no-pressure on-site quote. We serve all of Central NJ, Union County, Essex, Monmouth, Middlesex, North Jersey, and NYC.
Request Your Free Quote
We typically respond within a few hours during business hours.
Explore Our Other Services
Polished Concrete
Commercial and industrial polished concrete floors for warehouses, retail, and offices across NJ & NYC.
Learn More →
Warehouse Floor Coatings
Heavy-duty industrial epoxy and polyaspartic systems for warehouses and manufacturing facilities.
Learn More →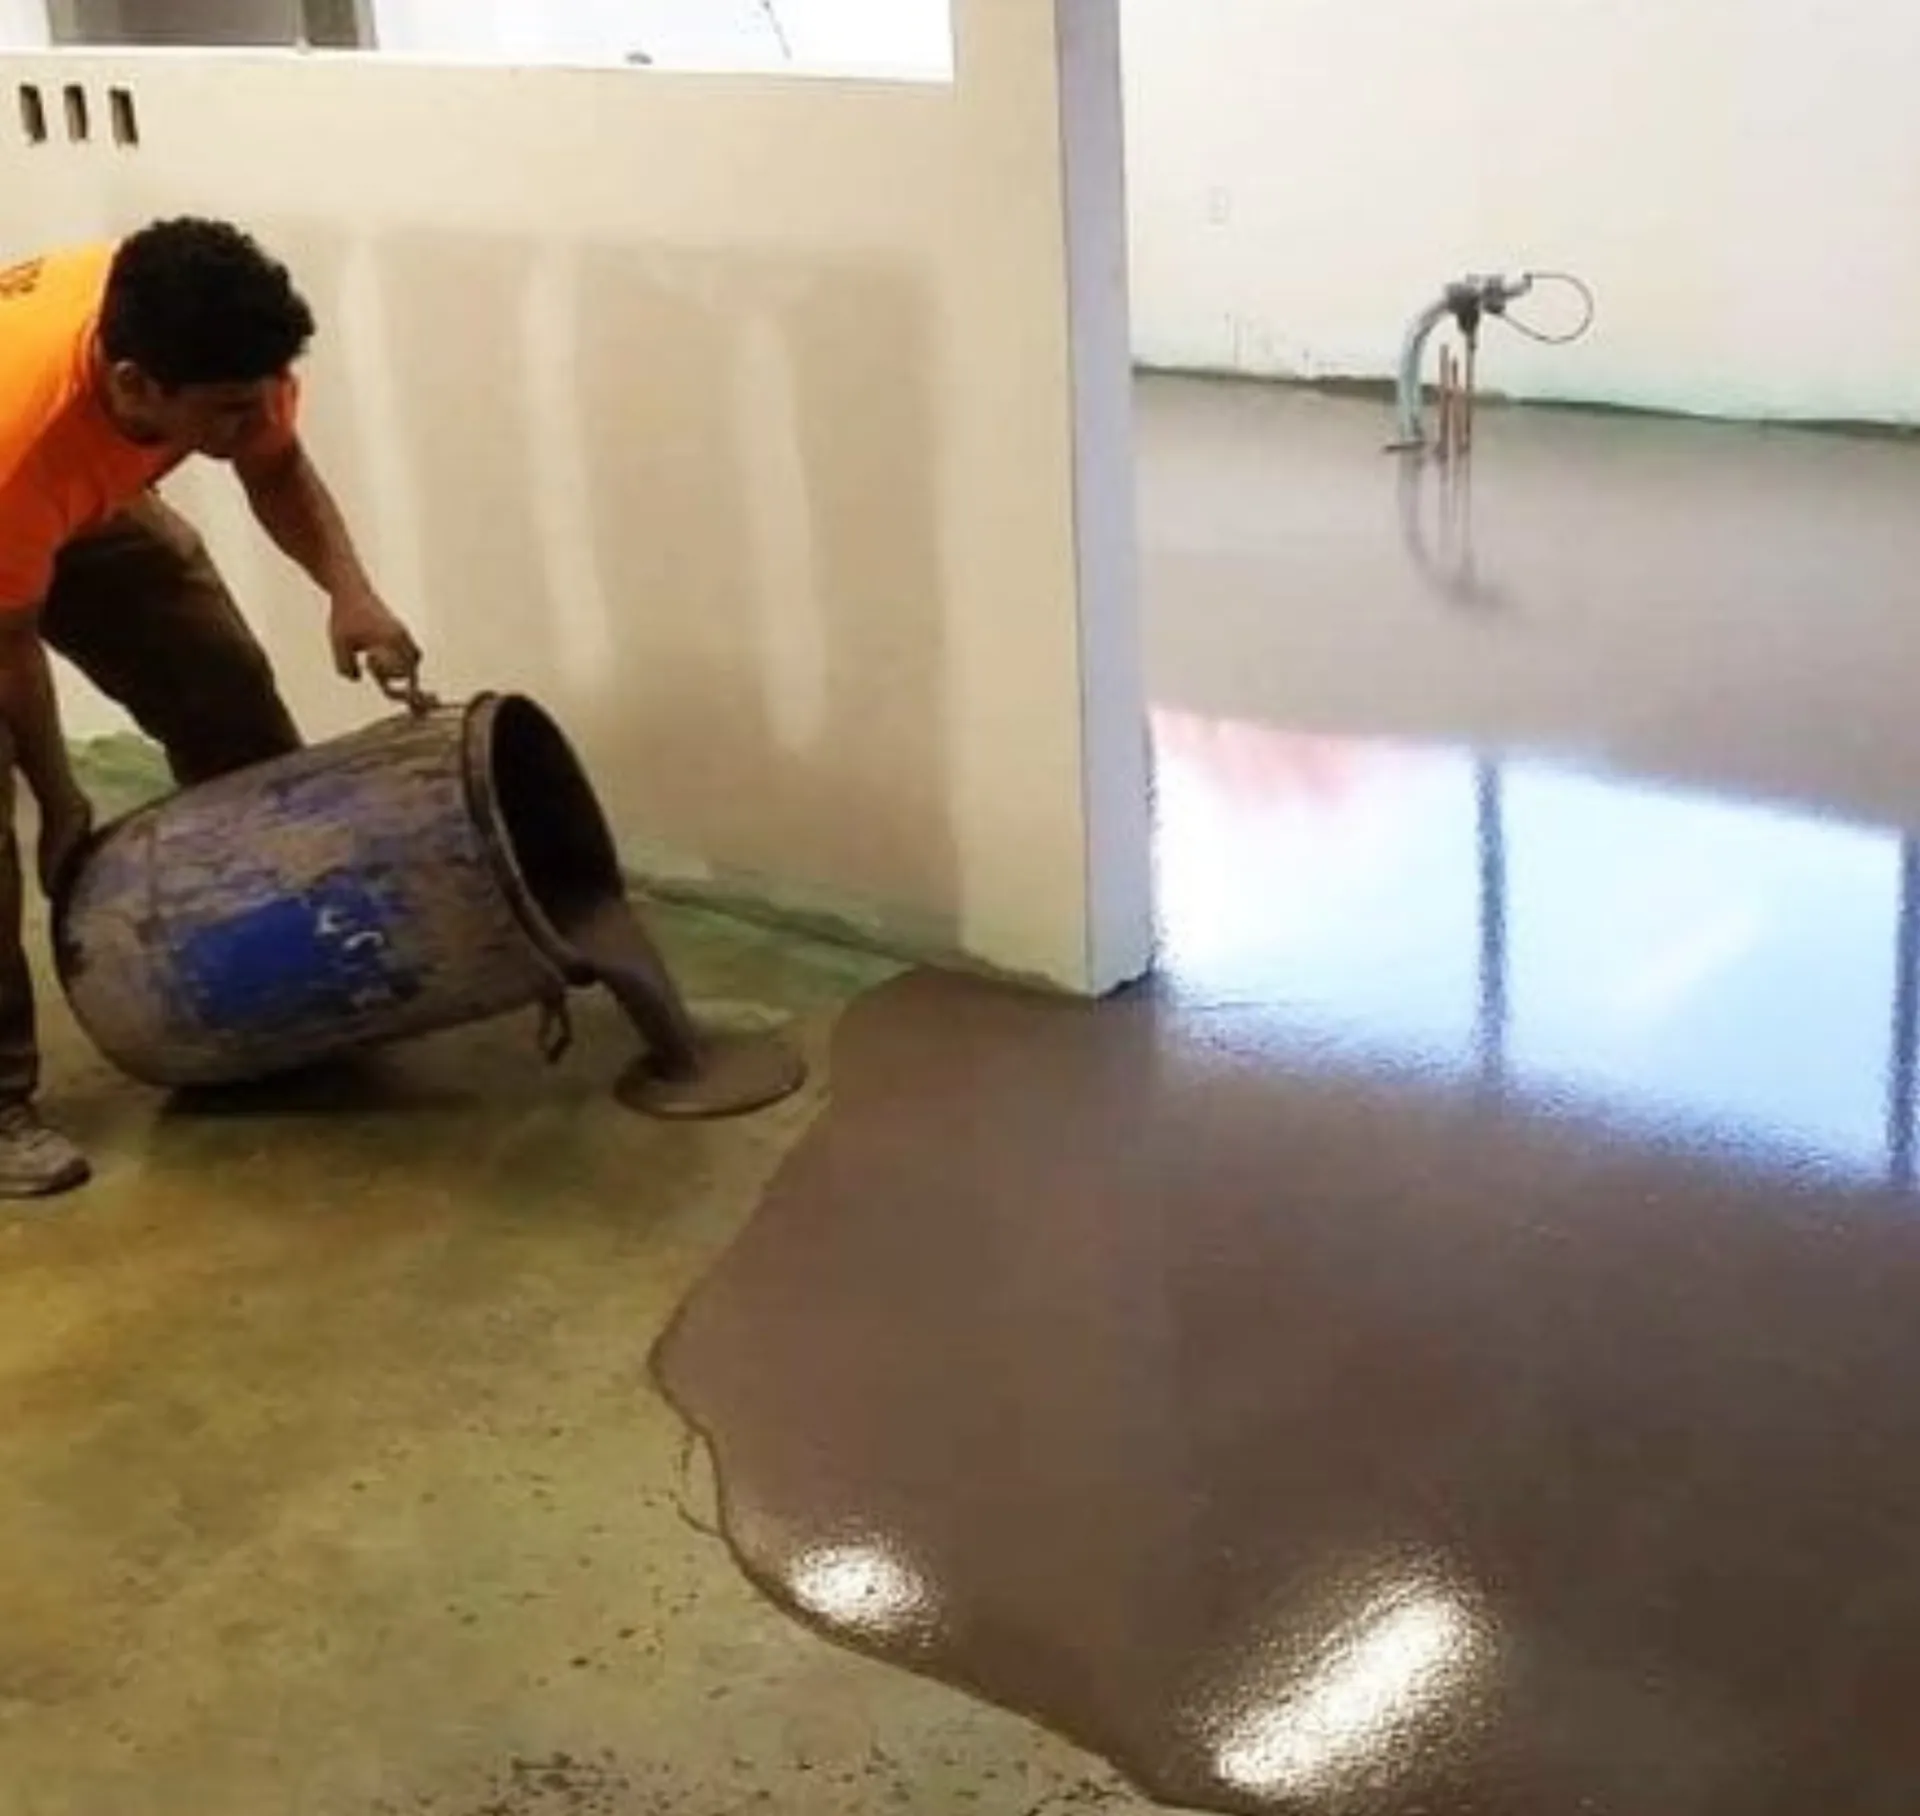
Self-Leveling Concrete
Fast, flawless floor leveling for renovations, tile prep, and commercial build-outs.
Learn More →